When you look at the admin panel, you might be overwhelmed the first time that you see it. That’s why, in this guide, we’re going to run you through the different options and settings on the admin panel.
Let’s start with the upper part of the admin panel.
Upper part – header
At the upper-most row, you will see the RumbleTalk logo; the number of seats, rooms, admins, and keywords; the upgrade page; and your username.
Below that, you will see the following:
- Selected chat
- Overview
- Settings
- Design
- Monetize (deprecated)
- Page
- Embed
Let’s talk about what each of these buttons does.
Overview
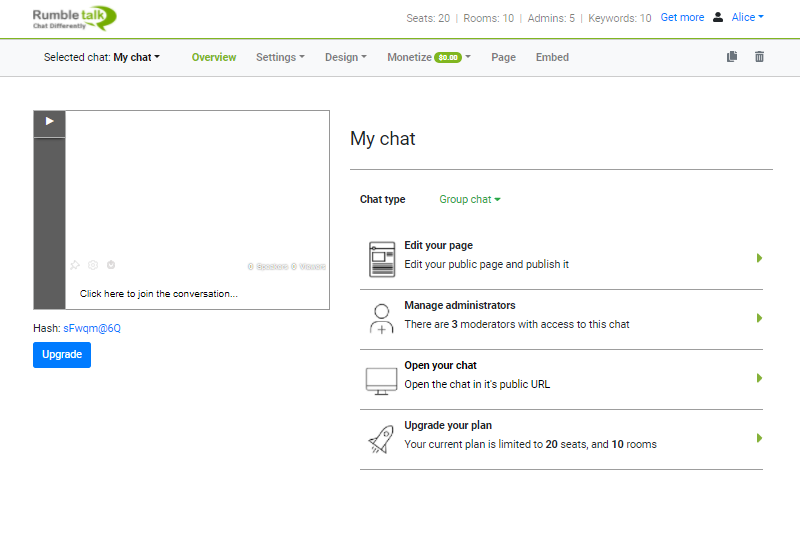
The Overview tab shows you everything about your chat room. You will see the following:
- Chat type – This shows what chat type you’re currently using
- Chat room – A miniature version of your chat room
- Upgrade your plan – Upgrading your current plan
- Manage administrators – Managing your current admins
- Edit your page – Edit your Page and publish it
- Hash – The chat hash code
- Open your chat – Opening the chat in a new tab
When you click on these buttons, it will take you to another page that’s on the description above.
Settings
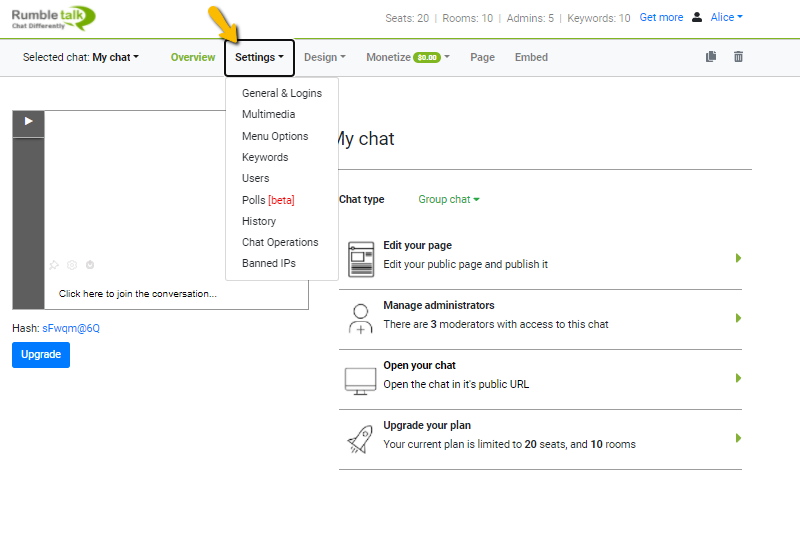
The Settings tab has the following:
- General & Logins – This includes chat types and login options.
- Multimedia – You can set your multimedia settings here (link embedding, emojis, etc).
- Menu Options – Hide or show chat menu options.
- Keywords – Add or delete active InText keywords.
- Users – Add or delete chat room users.
- Polls – Set up, publish, or delete a poll. You can also see the polls’ answers here.
- History – See here the chat history and archive.
- Chat Operations – Take the chat online or offline.
- Banned IPs – Add or delete banned IPs.
Design
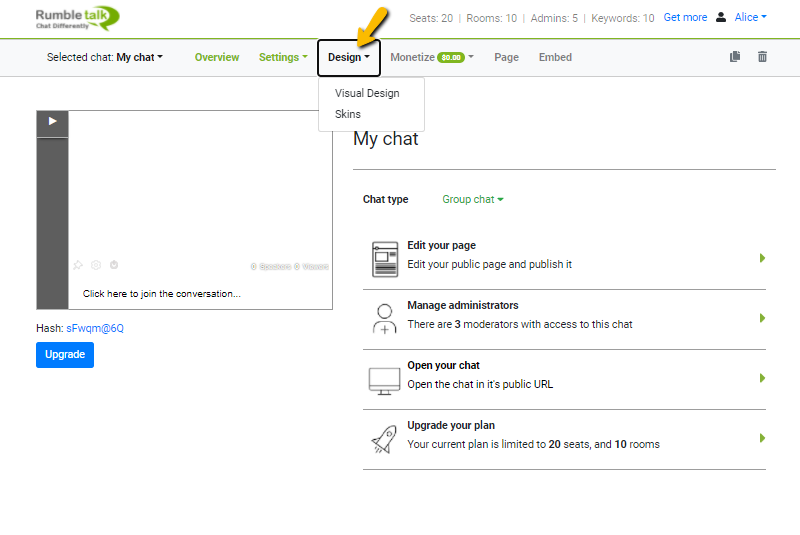
The Design tab includes the following:
- Visual Design – Customize your chat room with chat backgrounds, fonts, and more. For advanced customization, you can also inject CSS code.
- Skins – Change into a templated chat room design.
Monetize (deprecated)
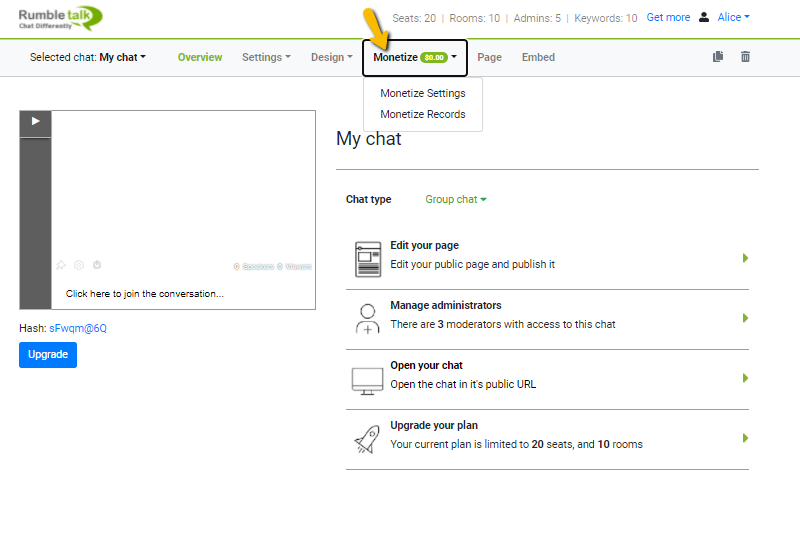
The Monetize tab lets you set up a paywall option for your chat room.
- Monetize Settings – This lets you enable the various monetization options for your chat rooms, such as donations, payment requests, and paywall.
- Monetize Records – This shows you the current records of the in-chat payment feature. It will show you who paid, the time and date, and what they paid for.
Page
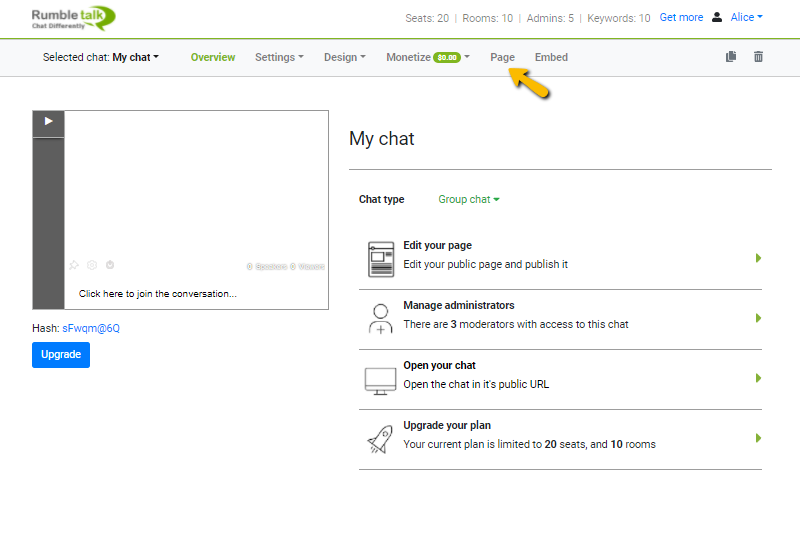
The Page tab is where you can see your minisite. Here, you can edit all the elements of your minisite. After that, you can add a page password and publish it. This can be used for online classes, consultations, small communities, and more. For more information about RumbleTalk Pages, read this blog.
Embed
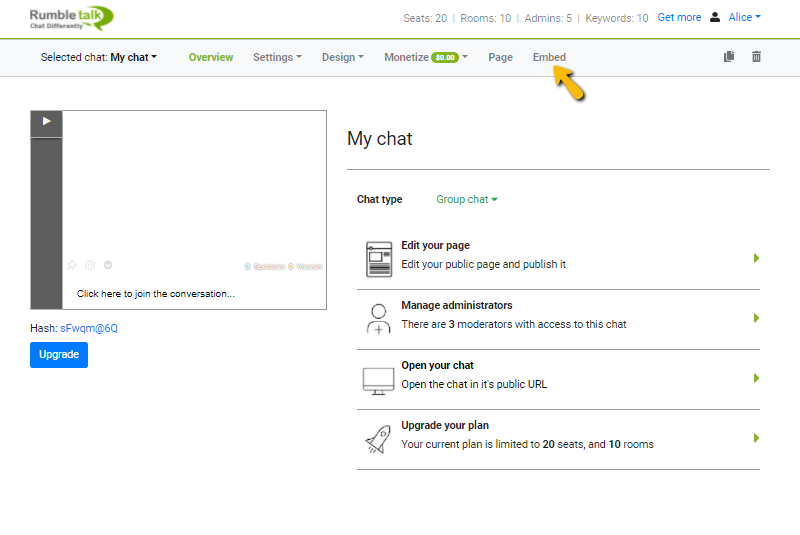
The Embed tab shows you how you can embed your chat. Here, you can generate an HTML code for your chat room. You can choose from two options: Embedded and Floating. After that, you can just copy and paste the generated code into your website.
The RumbleTalk admin panel
When you take time to study the admin panel, it’s not hard to know which is which. With this guide, we hope it can help you navigate the admin panel so you can play more with various settings. We post daily on our social media accounts, so follow us there if you want to see tips and tricks you can use on the admin panel.
In this regard, if you still don’t have an account, you can start with a free chat room here. Have a larger user base and need a dedicated group chat platform? Schedule a demo call and email us at support@rumbletalk.com.