Exploring the RumbleTalk admin panel

When you look at the admin panel, you might be overwhelmed the first time that you see it. That’s why, in this guide, we’re going to run you through the different options and settings on the admin panel.

Let’s start with the upper part of the admin panel.

Upper part

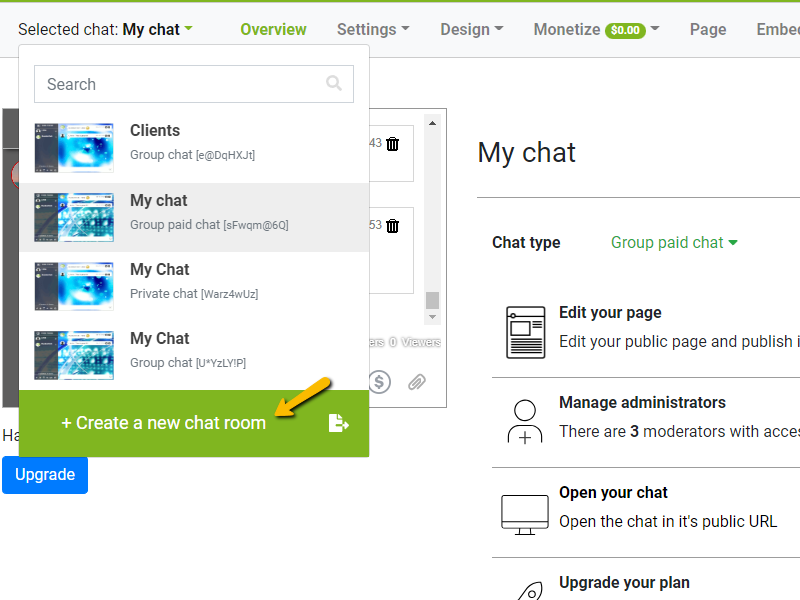
At the upper-most row, you will see the RumbleTalk logo; the number of seats, rooms, admins, and keywords; the upgrade page; and your username.

Below that, you will see the following:

  • Selected chat
  • Overview
  • Settings
  • Design
  • Monetize
  • Page
  • Embed

Let’s talk about what each of these buttons does.

Overview

admin panel

The Overview tab shows you everything about your chat room. You will see the following:

  • Chat type – This shows what chat type you’re currently using
  • Chat room – A miniature version of your chat room
  • Upgrade your plan – Upgrading your current plan
  • Manage administrators – Managing your current admins
  • Edit your page – Edit your Page and publish it
  • Hash – The chat hash code
  • Open your chat – Opening the chat in a new tab

When you click on these buttons, it will take you to another page that’s on the description above.

Settings

The Settings tab has the following:

  • General & Logins – This includes that chat types and login options.
  • Multimedia – You can set your multimedia settings here (link embedding, emojis, etc).
  • Menu Options – Hide or show chat menu options.
  • Keywords – Add or delete active InText keywords.
  • Users – Add or delete chat room users.
  • Polls – Set up, publish, or delete a poll. You can also see the polls’ answers here.
  • History – See here the chat history and archive.
  • Chat Operations – Take the chat online or offline.
  • Banned IPs – Add or delete banned IPs.

Design

The Design tab includes the following:

  • Visual Design – Customize your chat room with chat backgrounds, fonts, and more. For advanced customization, you can also inject CSS codes.
  • Skins – Change into a templated chat room design.

Monetize

The Monetize tab lets you set up a paywall option for your chat room.

  • Monetize Settings – This lets you enable the various monetization options for your chat rooms such as donations, payment requests, and paywall.
  • Monetize Records – This shows you the current records of the in-chat payment feature. It will show you who paid, the time and date, and what they paid for.

Page

The Page tab is where you can see your minisite. Here, you can edit all the elements of your minisite. After that, you can add a page password and publish it. This can be used for online classes, consultations, small communities, and more. For more information about RumbleTalk Pages, read this blog.

Embed

admin panel

The Embed tab shows you how you can embed your chat. Here, you can generate an HTML code for your chat room. You can choose from two options: Embedded and FloatingAfter that, you can just copy and paste the generated code into your website.

The RumbleTalk admin panel

When you take time to study the admin panel, it’s not hard to know which is which. With this guide, we hope it can help you navigate the admin panel so you can play more with various settings. We post daily on our social media accounts so follow us there if you want to see tips and tricks you can use on the admin panel.

In this regard, if you still don’t have an account, you can start with a free chat room here. Have a larger userbase and need a dedicated group chat platform? Schedule a demo call and email us at support@rumbletalk.com.

Instantly send audio and video messages with RumbleTalk group chat

It’s not just about sending text messages in a group chat. Sometimes an image or video is required to better explain a topic. For example, if you are holding a community discussion, you will need to share videos to present the topic. This is the time to send audio/video messages to the community to better explain the situation.

Not only that, but a feature like this is beneficial to businesses and professionals who provide their services online.

Audio and video messages can be sent in the chat room

You can send audio and video messages in the group chat.

You can use the feature in two ways:

  • Record up to 30 seconds of audio or video message and send it to the group chat, where all members can see it.
  • For private chats, you can record up to 30 seconds of audio or video messages.
virtual socializing

You can record audio and video messages that can be seen by the receiver/s when you open a group chat or a private chat.

Simply click the paperclip button in your group or private chat to send audio and video messages.

Then, you can record the message, review it, and send it to your colleagues.

How does recording work?

You can record almost anything using this chat feature.

For example, a step-by-step guide for a new process, a brief introduction to your students, or a video sample for your new product, the recording feature is brief but to the point.

Regardless of how you use it, the extended recording time will benefit your chat experience.

Bonus feature: Sending photos and copy and pasting images for faster sending

It’s simple to send photos in the group chat. There are two approaches you can take.

The first option is to directly upload photos.

communication solutions
  1. To begin, click the paperclip button in the text box. This will take you to the attachments page.
  2. To upload an image from your device, click Add file.
  3. Click Take photo if you want to share a new photo. This will take you to the camera, where you can take the photo you want to share.
  4. You can repeat these steps in the private chat. The only difference is that you’re only sharing it with one person rather than the entire group chat.

Another approach you can take is to copy and paste an image.

video messages
  1. First, locate an image that you’d like to share. You can find some on the internet.
  2. Then, with your mouse, right-click and select Copy image.
  3. Switch to RumbleTalk group chat and use the right-click or Ctrl + V to paste the image into your text box.
  4. Include the image in your group chat.

Find more information here: Copy and Paste Images in your Group Chat

Sending photos and videos is a must-have feature for any group chat

You should be able to send photos and videos to a group chat for your business or community at any time. Why is this the case? These are useful for any instructions or guides that cannot be easily explained in a message.

This can be avoided if you include a visual example for the members of your group chat. Others are welcome to add their thoughts if they notice anything unclear. As a result, any topic becomes easier to grasp.

Sign up for RumbleTalk to share your photos and videos with your colleagues, community, and clients.

Interested to learn more about RumbleTalk’s features? You can connect with us by sending us a message through our social media platforms (Facebook and Twitter). For a demo call, mail us at support@rumbletalk.com.

Tutorial: How To Enable/Disable Chat Features

As a RumbleTalk user, did you know that you can enable or disable chat features as you like? As an admin, there are a lot of chat features that you can play with. Moreover, as a chat owner, that privilege is endless. You control the chat room itself. Even admins won’t be able to use a feature if you choose to.

So, what are some handy features that you can enable and disable?

Chat menu options

menu options

Members of the chat, particularly admins, will find the menu options useful. Chat owners will be the ones who decide who gets to use which chat menu options.

It can be restricted to admins only, or only certain options are available to non-admin members of the chat. A chat owner can even go so far as to hide all options for all members. As a result, the decision is made by the chat’s owner.

Check out this article to learn more about the chat menu options.

Hide or unhide the user’s list

You have two options of hiding or unhiding your user list.

  • Hiding it for everyone;
  • Hiding it for non-admin users only.

Follow these steps to hide/unhide the user’s list.

  1. You must use the Rumbletalk admin panel to manage the users list.
  2. Enter your RumbleTalk username and password.
  3. Select Settings from the drop-down menu.
  4. Go to the General & Logins tab.
  5. Select the Advanced subtab.
  6. Check the For administrators only checkbox under Display the users list if you want to hide the user’s list from non-admin users. To hide it for everyone, uncheck the Display the users list checkbox.

If you’re operating a private chat room, this is very useful. No one would be able to see who is online unless they send a message to the chat room. Therefore, users can keep a bit of anonymity if they choose to only listen in the chat room.

Disable calls

You can hide the option to start a video call or audio call in the private chat by configuring it in the admin panel.

chat features
  1. Go to your admin panel.
  2. Select Settings from the drop-down menu after clicking on the Settings tab.
  3. Navigate to the Multimedia tab.
  4. Uncheck the boxes next to Allow Video Calls and Allow Audio Calls.

CSS-based functionalities

There are also various chat features that you can enable and disable through advanced CSS. If you want these features disabled, then you would need to have basic knowledge of CSS. Fortunately, we provide the codes that you only need to copy and paste.

Here are some samples.

Hide the QR box

Paste this code if you want to hide the QR code of your chat room.

To remove the button, add the following:

#options #opts { display: none; }

To keep the button for chat moderators only, add the following:

.moderator #options #opts { display: list-item; }

Hide the chat date and time

Each message by default will be stamped with the date and time it was sent. Use this code to remove this feature.

.message-date { display: none; }

Hide the user icons in the user list

All user icons will not be seen in the user’s list, only their usernames.

.user-image { display: none; }

Controlling the chat room by enabling and disabling chat features

Different chat rooms serve different functions. A public chat may not require as many options, whereas a members-only chat may. For instance, the export option is not used as frequently in public chat rooms. As a result, non-admin members can have the export option disabled. This is only one of many examples.

You can take command of your chat room when you enable or disable various chat features. It gives you more control over the direction of your conversation.

You can try the RumbleTalk chat room for free and tinker with these features. If you’re interested in a demo, you can also connect with us at support@rumbletalk.com.