How To Use RumbleTalk WordPress Chat Plugin

Is WordPress your choice for hosting your website? If yes, then we’ve got a WordPress chat plugin that you can use easily.

Since WordPress sites are customizable, plugins are there to help you elevate your website.

In this guide, we’re going to show you how you can download the RumbleTalk chat plugin, how to use it, what you can do with the chat.

Hey, if you’re looking at how you can integrate it into other websites or domains, go to this article.

Install the chat plugin

It’s easy to install the RumbleTalk chat plugin on WordPress. Firstly, log in to your WordPress dashboard.

Secondly, go to Plugins > Add New.

wordpress chat plugin

Thirdly, search for RumbleTalk in the search bar. Click Install Now.

Lastly, activate the plugin.

wordpress chat plugin

Immediately after activating the plugin, you will see RumbleTalk Chat in your WordPress settings.

Using your new WordPress chat plugin

Now that’s all settled, you need to set-up RumbleTalk to use it as a chat. Therefore, you need to log-in (if you already have an account) or register (as a new user).

So, if you’re a new user, opt to create a new account.

You will need to provide the following:

  • Email
  • Password
  • Confirm password

After that, proceed to create your account.

If you already have an account, click on Already have an account at the bottom right corner. It will lead you to the Update Token settings.

As said in the settings, log in to your RumbleTalk admin panel. Click the link above so you can be redirected to the page.

Once you’ve logged in, click your profile name (it can be your username or email), select Account Setting, and then click the Integration tab.

rest api

You will see the following: Key and Secret. These are needed for you to update your token on WordPress. Copy and paste them on your WordPress settings and save.

Once saved, your RumbleTalk chat should be seen on your WordPress site.

Features you can do with the RumbleTalk WordPress chat plugin

Create chat moderators

Since you have many chatters in one chat room, it’s good to have a helping hand when you’re not online. Or, you can also set yourself as a moderator to use all admin rights.

Here’s how you can set chat moderators with the WordPress chat plugin.

  • Go to the RumbleTalk chat plugin settings, then click on Settings.

NOTE: The chat hash is blurred because you should always keep your chat hash private.

  • Click Users.
  • Then, choose Add new user.
  • Fill out the form. Choose admin with global access or admin for specific rooms only to set a chat moderator.

NOTE: If you set a user as admin for a chat room, then this will allow other WordPress users from your database to login with the chat automatically and set passwords only for the administrators.

With these easy steps, you now have moderators, who can help you monitor your chat. Who knows, you might even use the moderated chat as your preferred chat type.

Set auto login for WordPress users

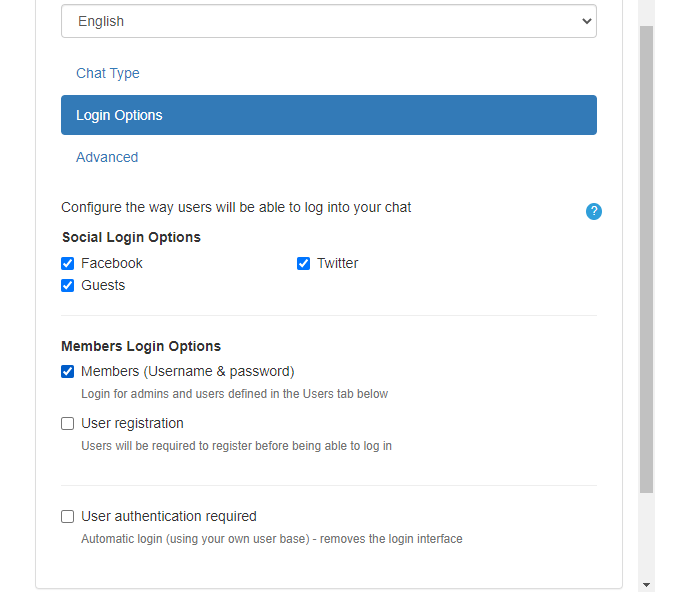
Did you know that you can set your WordPress users to be automatically logged in when they use the RumbleTalk chat plugin? When you want your users to be logged in automatically, here’s what you need to do.

  • Go to the RumbleTalk chat plugin settings, and then click Settings.
  • To activate the auto-login feature, just click the Members box as seen in the example above.

Now, when your WordPress users are logged in, they can immediately start chatting.

NOTE: If the settings are acting up, you can repeat the process again and save.

RumbleTalk WordPress chat plugin

RumbleTalk integrates with WordPress seamlessly. If you’re still confused about how it works, you can watch this short video.

All in all, RumbleTalk allows you to use all the features you see in the admin panel. Even if you’re not using it directly on a browser, you can still use it to its full capabilities.

Here are some features you can try out when you first use the chat plugin:

  • Customize your chat design.
  • Add rooms, keywords, and moderators.
  • Try out the different chat types.
  • Create a minisite.

These are just some of the features that you can try, but there is much more when you use the chat plugin.

Discover the platform by trying out our demo.

In case you’re having issues with the plugin, connect with us. We’ll gladly walk you through the process.

Essential Features You Need For Virtual Socializing

With all the things happening in the world right now, virtual socializing is your companion for connecting with other people. Virtual socializing lets you chat, call and send files to your audience, students, team, client, or anyone on the other end.

However, does it tackle all the points you need to address and be productive as you want it to be?

The features you need are here at your expense. With the right platform, you can expect virtual socializing to be successful.

Check out this list of features that RumbleTalk offers and see how it can help level up virtual socialization.

Features you need for virtual socializing

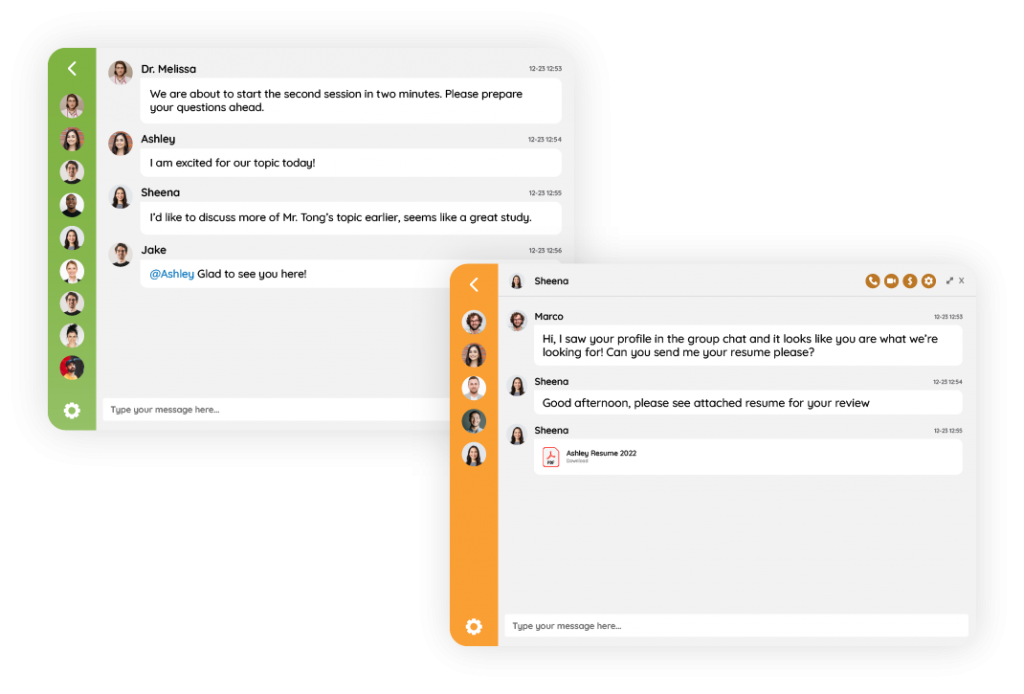
Group chat: messaging, sending files/images

Of course, group chats cannot be missing from virtual socialization. How can you talk to your team or client if you don’t have the right tool?

Group chats are perfect for virtual socializing since anyone can chat. If one of your team members need to say something, then they can send any message they want to relay.

Another feature of the group chat is that anyone can send files for sharing. RumbleTalk supports PDF, Word, Excel, and PowerPoint. Users can also share images and audio/video files.

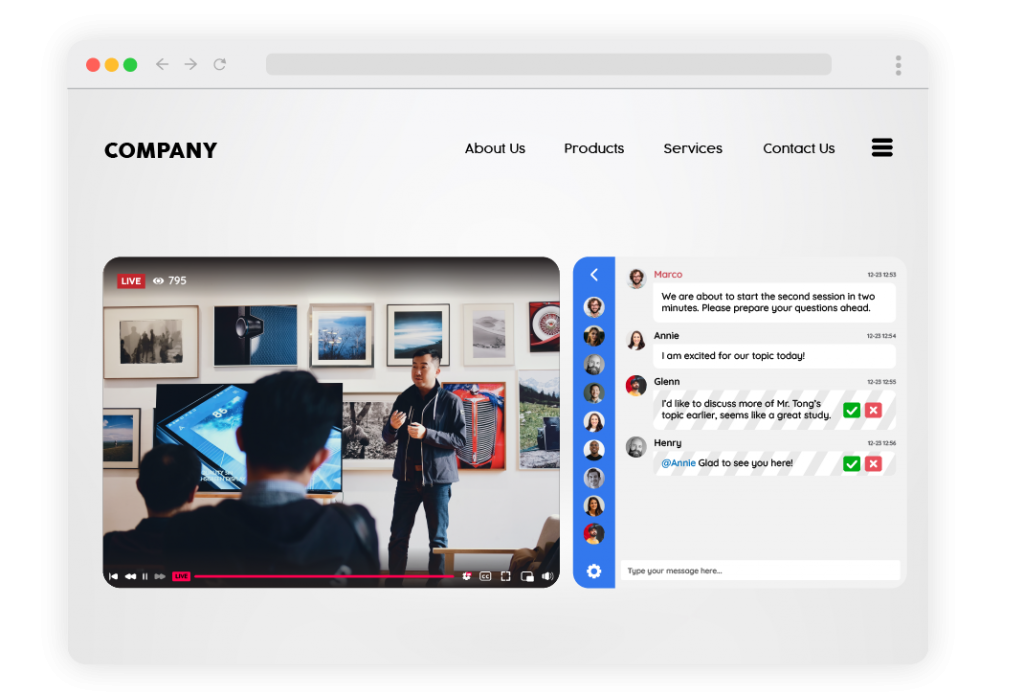
convention online

Also, users can take selfies and record short audio and video messages that are playable in-chat.

All in all, a group chat lets you hold virtual socializations instantaneously.

Private chat: private messaging, one-on-one audio/video calls

The private chat has a number of features that you can use for virtual socializing: private messaging and one-on-one video calls.

virtual meeting

Another great feature is requesting private payments. This can be used for requesting payment from clients. Thanks to this, payments are made easy! No need to go to the bank or open any other app for an online transfer.

virtual socializing

If you’re interested in this feature, you can read this article.

Moderated chat: pre-approve messages, Q&A mode

The moderated chat has the same features offered in the group chat. However, think of it as an upgraded version since the moderated chat lets you pre-approve messages.

What does that mean? This means that admins can approve or delete messages before they get sent in the chat. Users will not be able to see messages from other users unless they have been approved by admins.

audience interaction

Therefore, you can use the moderated chat as a Q&A mode for virtual socializing. Switch up your virtual social session and let your team/clients ask questions about the topic you’re currently talking about.

Then, as the admin, choose the questions you want to answer. Your team/clients will see it once you approve it so messages won’t be as cluttered as in a group chat.

Read also: Moderated Chat for Live Events

Bonus features

Admin mode

In the group chat or moderated chat, you can enable admin mode. The admin mode is a feature that admins can use to force users to stop typing or sending messages.

mute button

When activated, only admins can talk with each other. Admins can take advantage of this feature to relay important announcements or notifications.

For example, if you’re the head of your team, you can use admin mode to address important topics in the chat before letting your team type in their comments.

To enable admin mode, go to your chat menu. One of the options there is admin mode. Click it to enable the feature. As seen in the example above, non-admin users will see it on their chat boxes so they cannot type or send messages.

For admin users, they will see it on the upper part of the screen. Therefore, they can still send messages in the chat.

mute button

Exporting chat transcripts

Want a copy of your chat today as a reference for future meetings? Then, you can export your chat transcript with RumbleTalk.

If you want to export your chat transcript, then open the chat menu. Click Export transcript and it will automatically download your chat transcript in HTML format.

export chat transcript

If you want to download your chat transcript in different formats, go to your admin panel > Settings > History.

Click Export and choose what extension you want to download your chat transcript.

You can export it in three ways:

  • HTML
  • CSV
  • Doc
virtual socializing

Want to know what other features admins can do in the chat? Check out this blog: Important Community Chat Features for Administrators

Virtual socializing made easy

We hope this blog helps you in your next virtual social session. If you’re looking for a platform for your next meeting, try RumbleTalk and see how the features work out for you.

Try the demo for free.

All You Need To Know About Q&A In An Online Event

It’s always a good idea to include a Q&A session during or after an online event, webinar, team meetings, or conferences.

Why is a Q&A powerful? It gives your audience a voice and the right to be heard.

Therefore, they’ll get more from an online event. However, holding Q&As at an online event is not as easy as doing it in person.

So, how do you run a successful Q&A session in an online event?

Running a successful Q&A on an online event

online event

You can choose from two options when running a Q&A on your event:

  1. Use a live chat to ask questions
  2. Use a moderated chat dedicated to Q&A

When you hold an online event, it’s usually done on a website or a social media page. Usually, these two have the following:

  • A live chat wherein messages from the audience come in continuously, leading to only a few messages read.
  • A normal group chat wherein anyone can chat. Therefore, spammers or trolls can also send messages.

The above can work for some online events such as webinars, team meetings, or small conferences, but it may not work for other events.

A good example would be using it for large events such as huge conferences where thousands of people are watching. Messages may come in too fast, and some questions may not be addressed.

It can even be distracting for both the audience and speakers.

So, you can use RumbleTalk as an alternative Q&A chat.

Even online event pros recommend using a separate Q&A platform for your events. Here are the top advantages of using a dedicated Q&A platform.

1. Tell your audience you’re using a Q&A chat

If you want your audience to be active in your online event, then tell them that you’re open to questions.

Let them know that they can send their questions through the Q&A chat and moderators will choose which questions will be answered.

2. Ask your audience for questions

Before, during, and after the event, engage your audience. Don’t let the energy die.

Keep on asking for questions and your audience will get hyped to ask them.

Since you’re being a good moderator or speaker, your audience will have lots of fun and be active in your live event.

3. Better Q&A experience

online event

Since you have a dedicated Q&A chat for your event, then the Q&A will become easier to manage.

Your moderators are there with you and will help you with your event.

Moderators will approve questions and delete unnecessary messages in the chat.

Also, you can export your chat history if you want to see the questions that were sent by the audience.

Then, share the unanswered questions with your moderators or answer them on your social media platforms as a bonus.

4. No need for distractions

Your audience can focus on your online event by only approving questions necessary for the topic.

The moderators don’t need to approve irrelevant questions or messages. With this, your audience is assured with richer knowledge by the time the event ends.

5. All-in-one Q&A chat for your online event

By using a dedicated Q&A platform, you can do whatever you want on your live event. Then, you can also do what you want in your Q&A session.

Since they are different platforms, you will not have any limitations from each platform in the sense of their own features.

This means that you don’t have to conform to the live stream platform’s limitations or vice versa.

What’s more, RumbleTalk is not only for online events but also for any event that has an audience (e.g., conferences, live streams, or questionnaires).

How to add a Q&A platform for your online event

Moderated chat is one of the chat types that RumbleTalk offers. The moderated chat lets admins pre-approve messages before being read by your audience. So, your admins are the moderators of your online event.

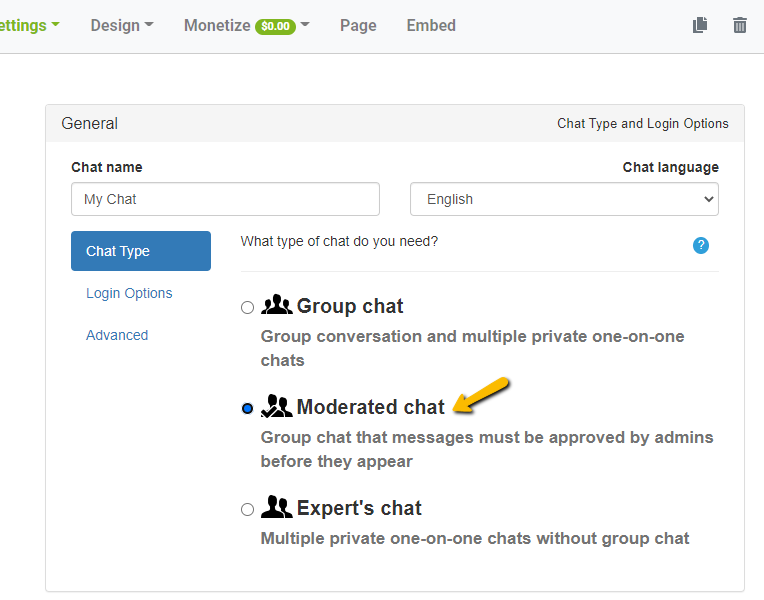
To use the moderated chat, choose moderated chat on your admin panel.

online event

After choosing moderated chat, appoint admins to your chat room. They will serve as the moderators who will approve messages.

Click Users on your admin panel. Then, add a new user.

online event
q&a live session

After appointing admins, start your online event with your Q&A chat next to it.

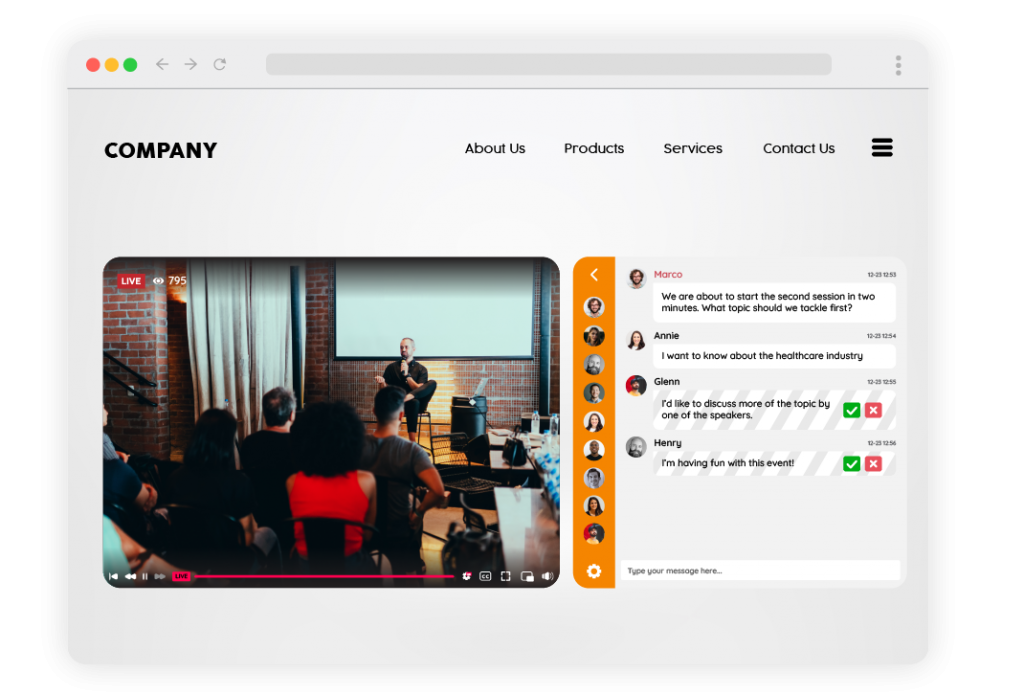
Use the moderated chat as a Q&A chat by letting your moderators choose the questions that were sent by your audience.

Furthermore, not all messages are seen by your audience. Only approved questions by moderators can be read by your audience.

See the difference between the moderators’ view and the audiences’ view.

q&a live session
admin view
digital event
user view

What’s more, you can use RumbleTalk to monetize your event with the Q&A chat. Read also: InChatPay and PayConnect: Monetize Your Chat

Your next move

In this blog, we’ve shown you the different advantages of using a dedicated Q&A chat for your online event. In addition, we showed how you can set it up on your event. What are you waiting for?

Schedule a demo with us or register to immediately use the moderated chat. We hope this blog has helped you to decide what to use on your next event. So, are you using a website/live stream platform for your Q&A or a dedicated Q&A chat like ours?

Level up your next event. Get a Q&A chat.