Security and accessibility are critical for websites, especially those offering group chat functionalities. Over the last year, cloud environment intrusions increased by 75%. This led companies to find stronger cybersecurity measures. One powerful tool for enhancing both security and accessibility in the chat service arena is the use of group chat SSO.
This blog will explore the concept of SSO, its application in group chat settings, and why it’s essential for website creators. Whether you’re building a community platform or a business communication tool, understanding SSO can significantly impact your site’s security and usability.
Single Sign-On (SSO) for Websites
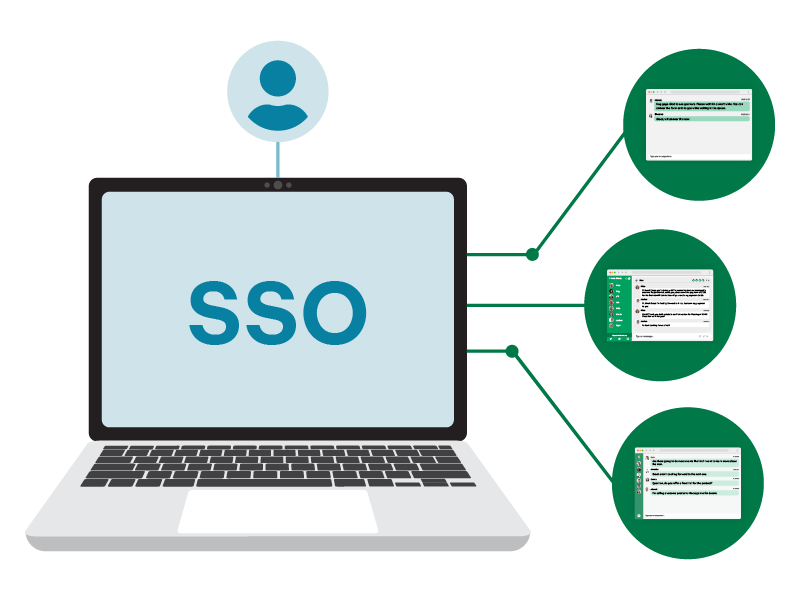
Single Sign-On (SSO) is a user authentication process that allows individuals to access applications or services with one set of login credentials. Instead of remembering multiple usernames and passwords for different platforms, users can log in once and gain access to various services seamlessly.
This not only simplifies the login process for users but also enhances the overall security of the system by reducing the number of passwords that need to be managed.
SSO operates through a centralized authentication server that handles the login requests from different applications. When a user attempts to access a service, the application sends an authentication request to the SSO server.
The server verifies the user’s credentials and, if they are correct, sends back an authentication token. This token acts as proof of the user’s identity and grants them access to the desired service. The entire process is secure, as the user’s password is only transmitted once, reducing the risk of interception.
There are several types of SSO methods, each with its own set of features and use cases. Common SSO technologies include OAuth, SAML (Security Assertion Markup Language), and OpenID Connect. OAuth is widely used to grant third-party applications access to user data without exposing passwords.
SAML is a standard for exchanging authentication and authorization data between parties, typically used in enterprise settings. Lastly, OpenID Connect builds on OAuth to add user authentication, making it a versatile choice for modern web applications.
Enhancing Security
First, centralized authentication through SSO offers a robust security framework for websites with group chat functionalities. By managing all login requests through a single authentication server, SSO minimizes the risk of unauthorized access.

This centralized system ensures that all access points have the same security protocols, reducing vulnerabilities. Additionally, it simplifies the monitoring process for administrators, who can track all login attempts from one central dashboard.
Another significant security benefit of SSO is the reduction of password fatigue. Users often struggle to remember multiple passwords, leading them to reuse simple or weak passwords across different platforms. SSO mitigates this risk by allowing users to maintain just one strong password.
This not only enhances security but also improves user convenience, as they no longer need to manage numerous credentials. A robust SSO system encourages the use of complex passwords, as users have fewer to remember.
In today’s landscape regulations, compliance with data protection laws such as GDPR and CCPA is crucial. SSO helps organizations meet these regulatory requirements by centralizing user authentication and data management.
This centralization makes it easier to implement security measures like encryption and access controls, ensuring that user data is protected. Moreover, SSO systems often include logging and monitoring features, which are essential for auditing purposes and maintaining compliance with legal standards.
Improving Accessibility
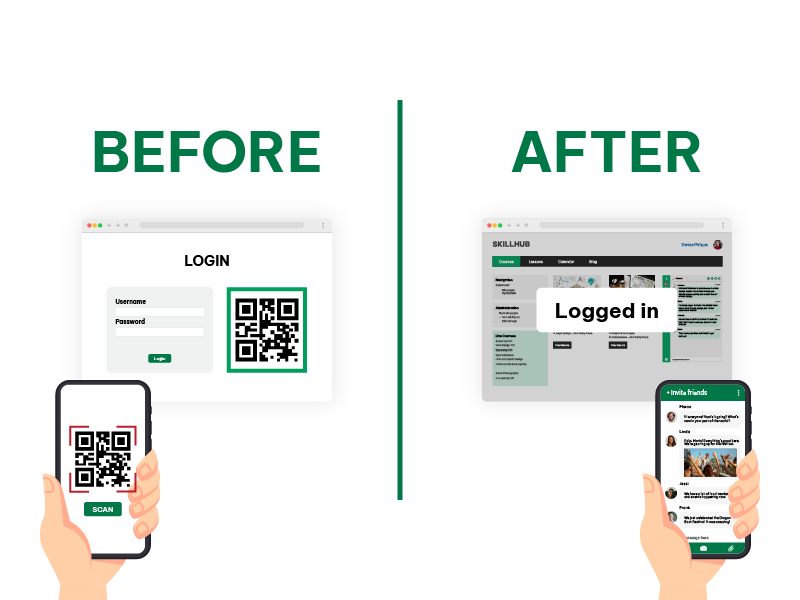
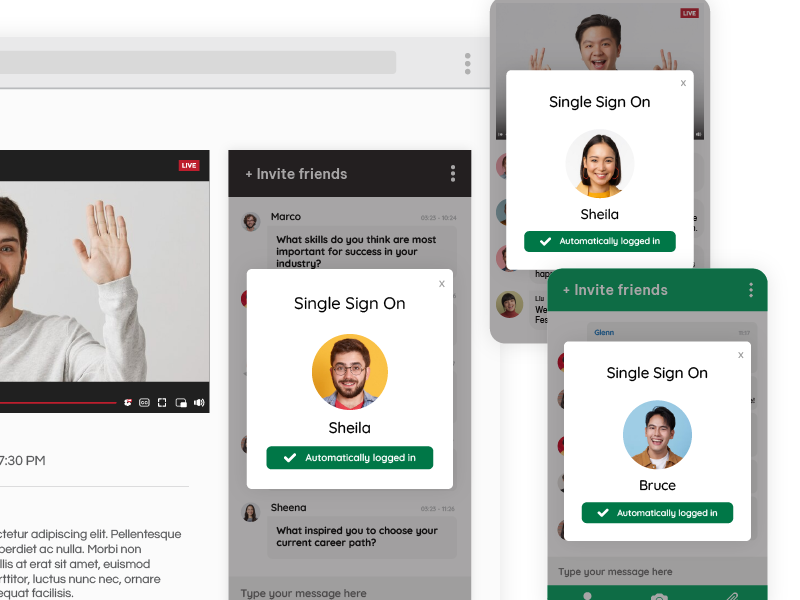
Group chat SSO is a group chat with SSO capabilities. This means that, if you’re using a group chat on a third-party website, members of your website will be automatically logged in if they choose to join the group chat.
Now that we’ve discussed the basics of SSO, how does it help group chat rooms?
Seamless User Experience
A group chat with SSO significantly enhances the user experience by streamlining the login process. Instead of navigating multiple login pages and entering different credentials for each service, users can access all necessary applications through a single login.
This is particularly beneficial in group chat settings, where users may need to switch between different services or platforms quickly. By reducing friction in the login process, SSO keeps users engaged and focused on the tasks at hand.
Streamlined Onboarding
Onboarding new users can be a difficult process, especially when multiple accounts and credentials are involved. Group chat SSO simplifies onboarding by allowing users to access all the services they need with just one set of credentials.
For new community members or employees, they can start using group chat features immediately without the hassle of multiple account setups. An efficient onboarding process not only saves time but also enhances user satisfaction and retention.
Cross-Platform Accessibility
In today’s multi-device world, users expect to access services seamlessly across different platforms—whether it’s a desktop, tablet, or smartphone. A group chat SSO facilitates this by providing a consistent authentication mechanism that works across all devices.
Once users log in through SSO, they can access group chat features and other services on any platform without additional logins. This cross-platform accessibility is crucial for maintaining user engagement and ensuring a smooth, uninterrupted experience.
Setting Up Group Chat SSO on Your Website
Choosing a provider is the first step in implementing SSO for group chat functionalities. Your provider should offer robust security features, ease of integration, and scalability to accommodate growing user bases. It’s also essential to consider the provider’s compatibility with your existing infrastructure and the specific needs of your website.
Providers like RumbleTalk offer comprehensive SSO solutions that cater to various industries, ensuring that you can find a package that suits your requirements. Click here to learn more about our group chat SSO.
Integrating SSO with your group chat application involves several key steps.
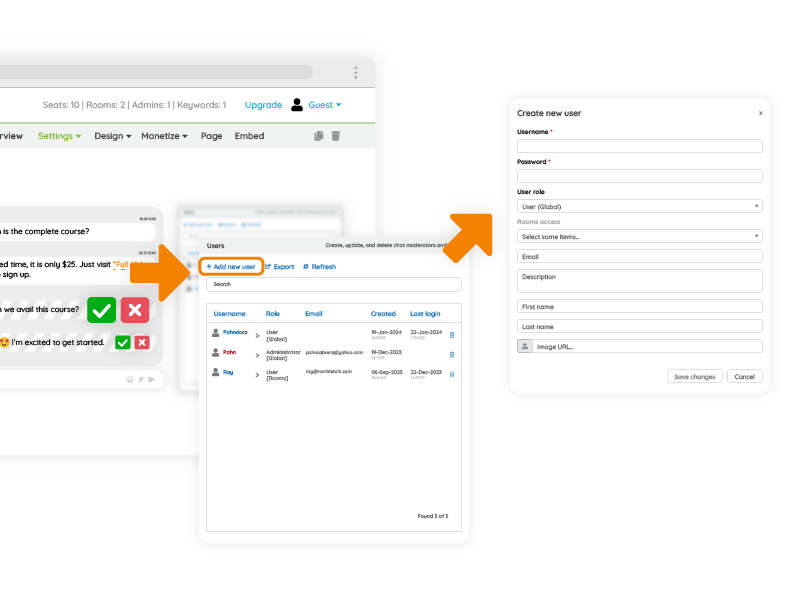
- Configure your website to accept authentication tokens from the SSO provider. This usually involves setting up an identity provider (IdP) and configuring service provider (SP) settings.
- Implement API integrations that allow your chat application to communicate with the SSO system. It’s crucial to test the integration thoroughly to ensure that it works seamlessly across all platforms. RumbleTalk, for example, offers detailed documentation and support to guide you through the integration process.
Once the SSO system is integrated, it’s vital to conduct comprehensive testing to identify any potential issues. This includes testing different user scenarios, such as first-time logins, password resets, and account linking.
Monitoring tools can also be useful for tracking authentication errors and identifying security vulnerabilities. If issues arise, most SSO providers offer customer support and troubleshooting guides. Regular updates and patches should also be applied to keep the system secure and efficient.
How To Maintain Group Chat SSO
Maintaining a secure group chat SSO system requires ongoing surveillance. Regularly update your SSO configurations and apply security patches to protect against new threats.
Implement multi-factor authentication to add an extra layer of security, ensuring that even if one authentication factor is compromised, additional verification is required. Regular audits and security assessments can also help identify vulnerabilities and ensure that your system complies with the latest security standards.
While group chat SSO simplifies the login process, it’s essential to educate users about its benefits and usage. Provide clear instructions on how to use SSO, including setting up their accounts and linking existing accounts.
Moreover, informs users about the security features in place, such as encryption and data protection measures, to build trust. Regularly update them on any changes to the SSO system or login procedures to ensure a smooth user experience.
Last but not least, regularly review your SSO setup to ensure it meets your website’s security and accessibility needs. This includes assessing the effectiveness of current security measures, evaluating user feedback, and staying updated with the latest SSO technologies.
Constant reviews allow you to adapt to changing security landscapes and user expectations, ensuring that your SSO system remains robust and efficient.
Group chat SSO is the key to making any website user-friendly
In summary, integrating SSO with group chat applications offers numerous benefits, from enhanced security and user convenience to improved data protection and compliance.
By centralizing authentication, group chat SSO reduces the risk of unauthorized access and password fatigue. It also simplifies the user experience, allowing for seamless access across different platforms and devices. For website makers, adopting SSO is a crucial step in creating a secure, accessible, and user-friendly online environment.
Website creators and administrators are encouraged to explore SSO solutions to enhance their site’s security and usability. Implementing SSO not only protects user data but also streamlines access to group chat features, making your website more appealing to users.
Consider partnering with reputable providers like RumbleTalk to ensure a smooth and secure SSO implementation. Take the first step towards a safer, more accessible online community by using a group chat SSO today.

