Online events are a good way to talk to your audience. It may be a conference, summit, or product launch. What matters is that you have an engagement solution up your sleeve.
A question and answer session is always a good idea for any online event. You give your audience a voice. Because you listen to their voices, you make them heard.
In an online event with a Q&A session, the audience is free to ask whatever they want. However, it can be confusing to see all questions coming in the group chat simultaneously.
So, how can you hold an online event with a Q&A without failing?
Let’s see why having a moderated chat is the perfect engagement solution.
Increasing your engagement rate
When you arrange a live event, it’s usually held on a website or a social media page. They will have the following:
- A live chat wherein the audience is continuously sending messages, leading to a non-stop message spree.
- A group chat wherein everyone can send messages.
This can be a good solution for some online events like small conferences or community discussions. However, if you’re holding a larger event like conferences or summits, then you would need a better engagement solution such as a moderated chat.
For example, at large events, thousand of people are watching and commenting. Messages are coming in fast, and you cannot handle this influx of messages. So, how can you answer the questions?
This scenario is not good for both the audience and the speakers.
Therefore, it’s better to choose from one of these solutions:
- Ask questions using downloadable live chat software.
- Hold a Q&A session through a moderated chat with a group chat platform.
With RumbleTalk group chat, you can easily create a moderated chat that you can use for Q&As. No download needed.
For event pros, using a separate group chat platform for your live events is better. Let us show you how to add a moderated chat for your event.
How to add a moderated chat and use it as your engagement solution
The moderated chat is one of the chat types that RumbleTalk offers. It’s a chat type that lets admins approve messages before they appear in the group chat.
If you want to use the moderated chat your chat type, here are the steps that you need to follow.
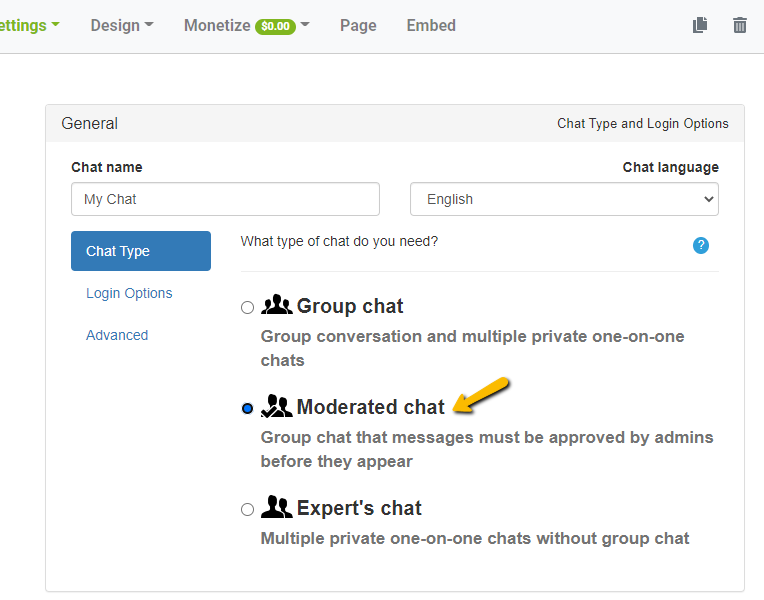
- First, go to Settings > General & Logins.
- Next, see the list of chat types available. Choose Moderated chat.
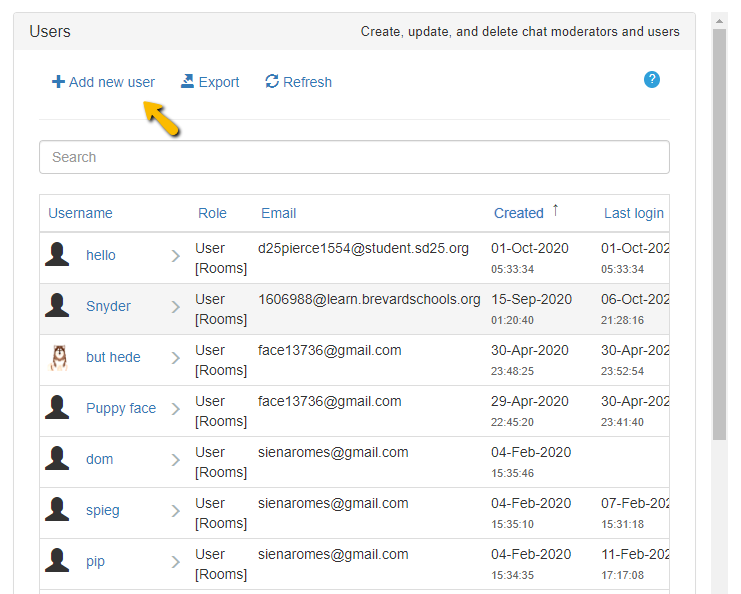
Starting now, all messages need to be approved by admins. So, the next step is to add admins, which will act as moderators, to your chat.
To add admins, follow this guide.
- Select Settings > Users.
- Then, click Add new user and type all the details needed such as username and password.
- Lastly, choose if they will have room-only access or global access.
When everything’s done, you can start using the moderated chat next to your live stream.
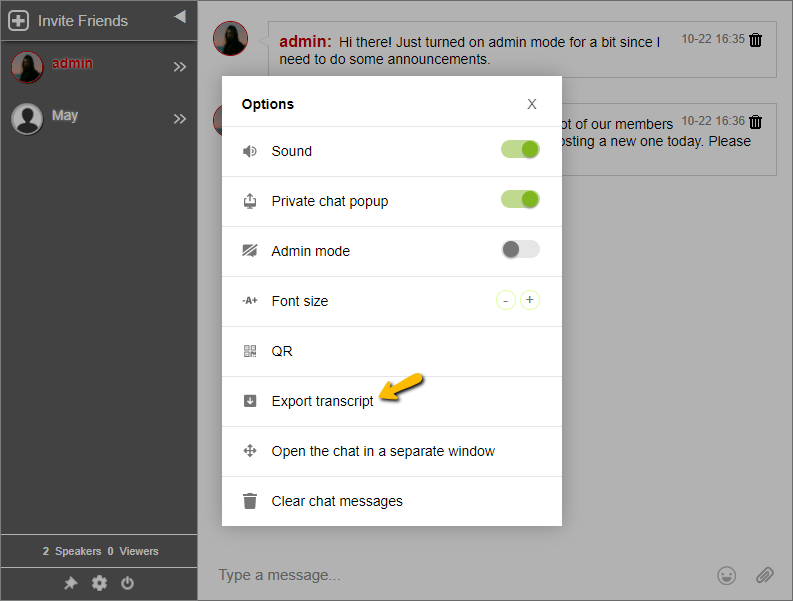
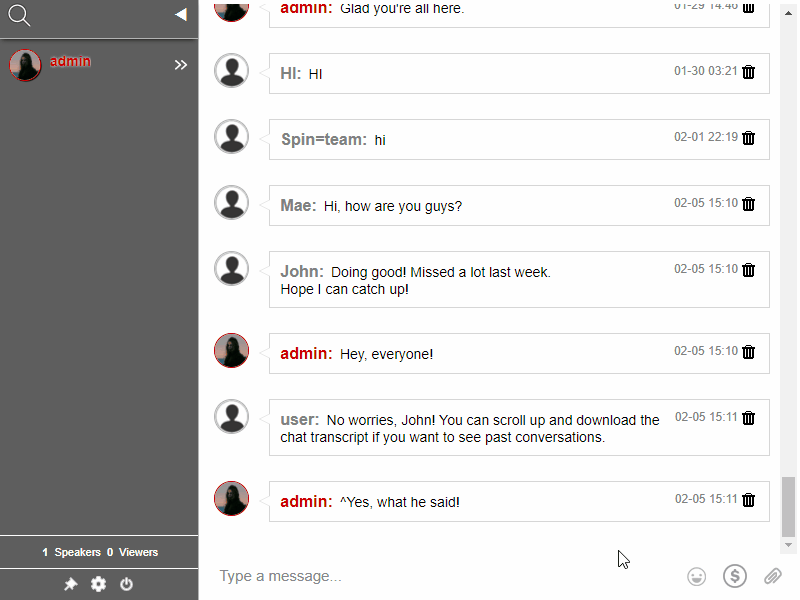
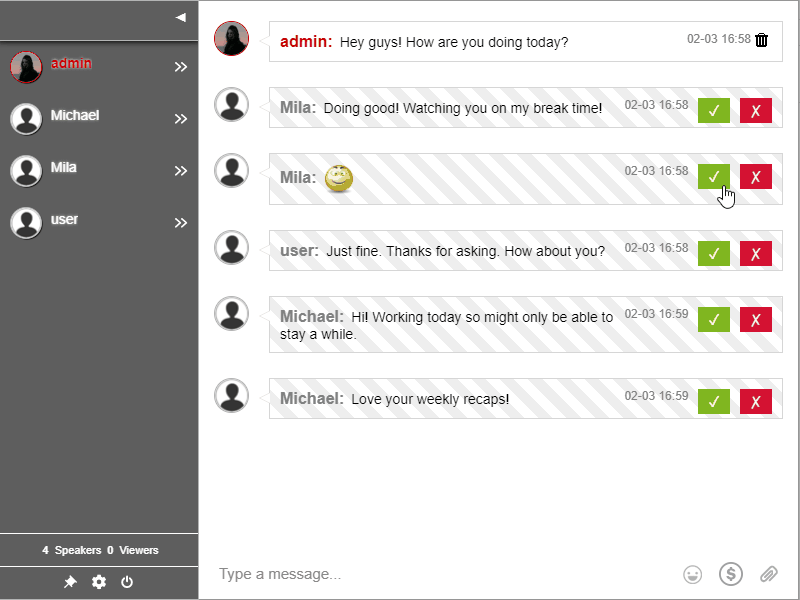
Here’s how the moderated chat looks like.
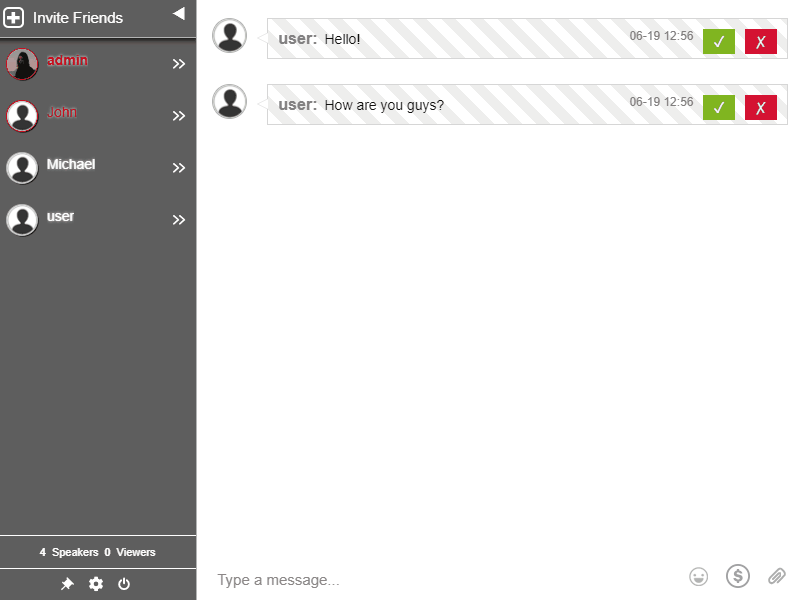
Unless the admins approve a message, it won’t appear in the non-admin users’ group chat. Furthermore, only admins can approve or delete messages.
So, the chat is free of spam and stays clean. No unnecessary messages, no clutter, and most of all organized. This is the reason why the moderated chat is the best for large events like conferences and summits.
Read this related article on organizing a Q&A session: Step-by-Step Guide for Organizing a Q&A Live Session
Advantages of using a separate group chat for live events
Engage your audience
When the event is ongoing or after the event, make your audience submit questions. This keeps them engaged and lets them feel that their opinions are heard.
If you choose to answer their questions, then they will be engaged to send more.
If you practice being a good speaker and moderator, you’re giving your audience the best event experience.
Let them know there’s a group chat
Don’t forget to let your audience know that there’s a separate group chat where they can talk. This should be done before the event starts. Advise them that it’s being moderated by admins to make them feel that the chat is secure. Also, let them know that they can send in their questions whenever they want.
Just make sure to send relevant questions, and then their question will have a chance to be answered.
Great event experience and engagement solution
Through using the moderated chat, you have a dedicated chat for Q&A sessions. With this, you get full control of your chat.
Your appointed admins are also there to help you. With their assistance, questions will be arranged and there will be necessary messages only in the chat.
No trolls, no spam, and no hate speech.
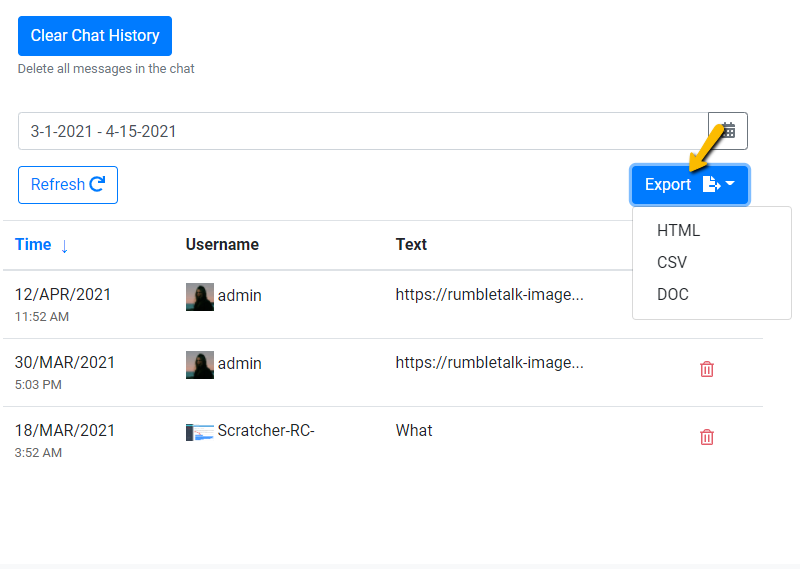
If you want to see the questions for future reference, you can easily export the chat transcript.
You can also share this with your audience.
Then, upload it on email, social media, or directly in the group chat so they can access it.
Level up your online event with this engagement solution
So, are you switching to a dedicated chat platform for your next online event? By sharing these tips and tricks, we hope this helps you set up a moderated chat for your event.
Engage your audience with a Q&A session. Sign up today.