The RumbleTalk chat plugin was built to be compatible with different WordPress members plugins. Usually, WordPress members plugins are using WordPress built-in user management.
The Rumbletalk chat plugin is integrated with WordPress built-in user management. Both the chat and members use the same userbase and are easily integrated. Normally, the integration takes less than a minute.
We made user integration extra easy wherein you can do it with one checkbox click. Here’s how you can do it.
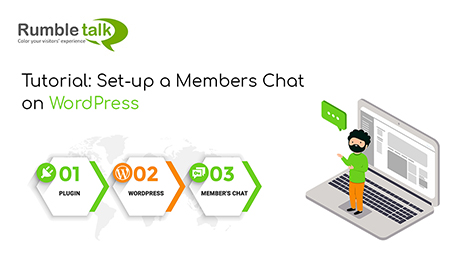
How to set up a WordPress members chat
To create chat integration, you will only need the RumbleTalk chat plugin.
You can easily integrate the RumbleTalk chat plugin into your WordPress website. This is very handy for you and will allow you to have a members-only group chat.
Here are the steps that you need to follow.
Installing the chat plugin
- First, install the WordPress Members plugin and follow the instructions.
- Then, install the RumbleTalk chat plugin and follow the set-up instructions given.
After doing these two steps, this will automatically integrate the RumbleTalk chat with the WordPress Members plugin userbase.
In turn, this will allow only members of the site to automatically log-in to your group chat with their username and password.
- When you finish installing all plugins, you should create an account with RumbleTalk. This will let you use the RumbleTalk chat as your members chat.

- Once you’ve done the steps above, this is how it should look like.
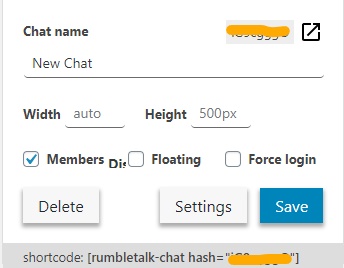
- Check the Members box to complete the process.
For more information, check this link.
WordPress chat integration with your WordPress members
Here are the settings that you need to set-up after downloading the chat plugin.
- Let’s assume you’ve installed the plugin and created a RumbleTalk account. Firstly, you’ll see the default chat (if you want more, you need to upgrade your account). Next, you want to connect your WordPress users to the chat. Simply check Members (see the example above). Then, save. By checking this checkbox, it will then seamlessly integrate the WordPress chat to use the WordPress registered users.
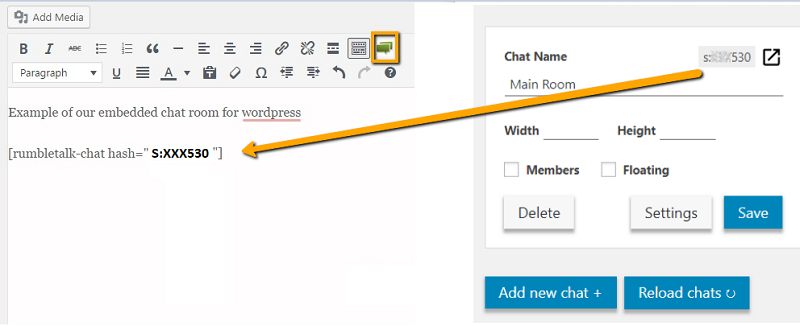
- The second thing that you would need to do is to embed the chat on your site. So, add the chat to a page where users need to login to see the content (e.g., member’s area). You’ll need to use the shortcode to do this.
- Third, login to your WordPress members area. Then, go to the page where you added the chat. Using their member’s area log in username, members are now automatically logged in to the chat. You only need to check the Members checkbox. It will automatically setup your chat.
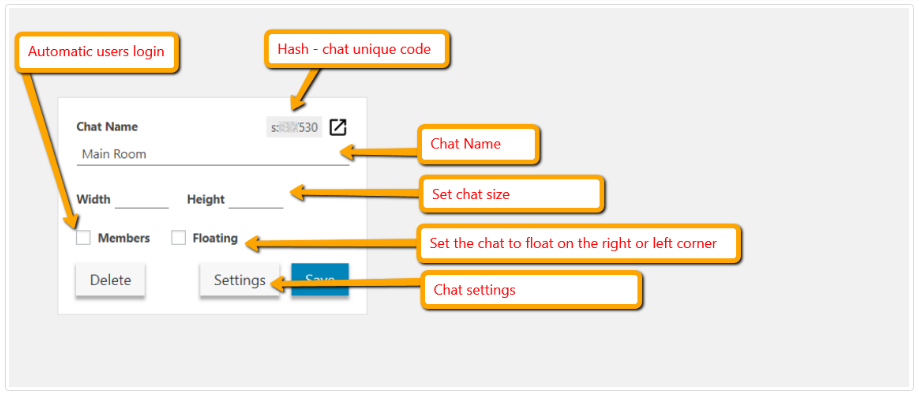
- Lastly, you can change your chat settings and customize the chat design to your liking. If you want to, then just click on the settings button. There are lots of customization options.
Now, the chat integration is complete.
As you can see, the process is quite simple. If you need more information about the installation process or settings, then you can check out the instructions here. Alternatively, you can watch this video.