So you’ve got your website, social media pages, and any other tools you’ll need to launch your brand. However, you would need more than this to be successful. That’s correct. We’re referring to the benefits of creating a mini website.
A mini website has surprisingly more benefits than we thought. We’ll share some of our experiences on minisites and how they can help you improve your digital footprint.
What exactly is a mini website?
A minisite is, as the name implies, a small website. This section contains all of the important information that you want your visitors to see right away.
A minisite’s key elements
It’s good to have a plan in mind when creating your minisite. Design is important in making your minisite cost-effective, just as it is in creating your website. Consider the following factors to entice visitors to stay or visit your website:
Content — Your content should be useful and relevant to your target audience. This should all lead back to your website and pique the interest of your target audience.
Design — Use an eye-catching design to captivate your audience. Make it something that will appeal to your entire target audience.
UI — Keep it simple and precise. Inform your audience about the purpose of your minisite and direct them to your main pages.
With these factors as a guide, you’re sure to have a successful minisite. So, how and where can you create a minisite? That’s the real issue here. Let us introduce RumbleTalk Pages.
What exactly are RumbleTalk Pages?
RumbleTalk Pages is a new feature that allows you to create a minisite. You can now make your own “CHAT” page in the cloud.
Consider adding a chat page to your website if you’re building a brand, the owner of a company, or an individual with a website dedicated to your service.
RumbleTalk Pages is a minisite template that allows you to customize the elements that you need.
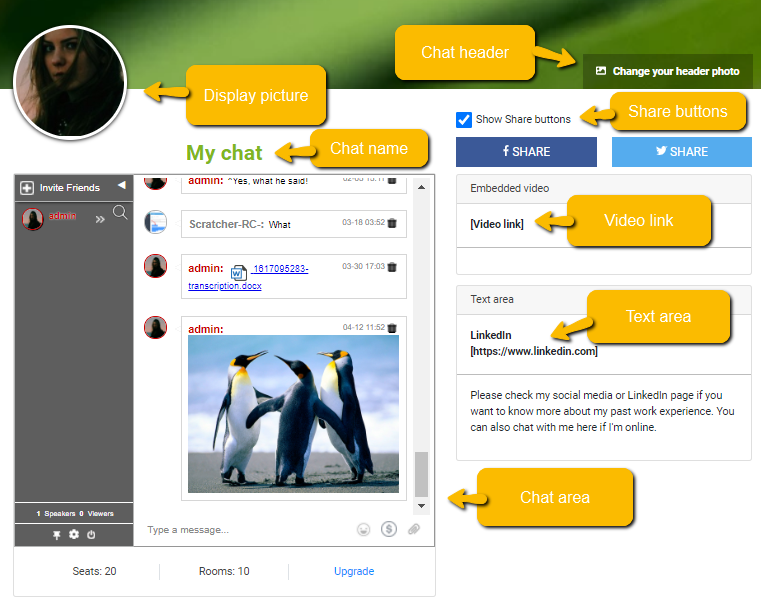
Here are the elements that you can modify:
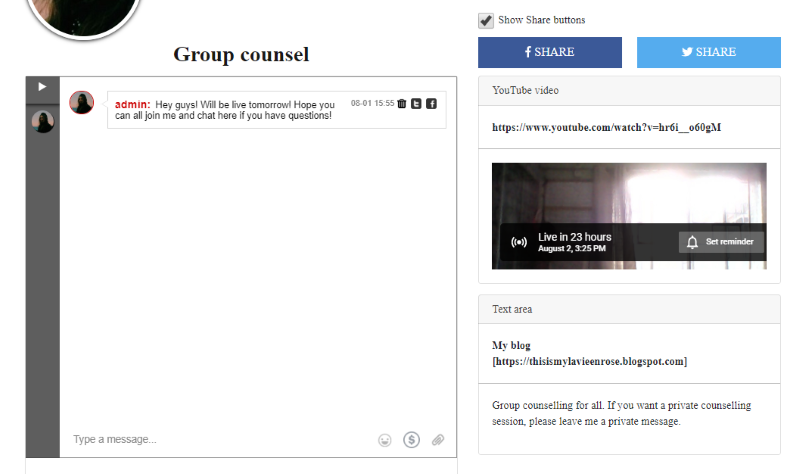
Profile and header image — Select photos that best represent your service or product. You can choose to display Facebook and Twitter share buttons.
YouTube URL — You can use this to link to a video about your product or service. Alternatively, you can post a link to your upcoming YouTube Live stream (more on that later).
Text area — In this section, you can include a site description. Inform your target audience about your service or product. Bring out your inner writer and capture the attention of your audience. This could be your strategy for attracting new customers.
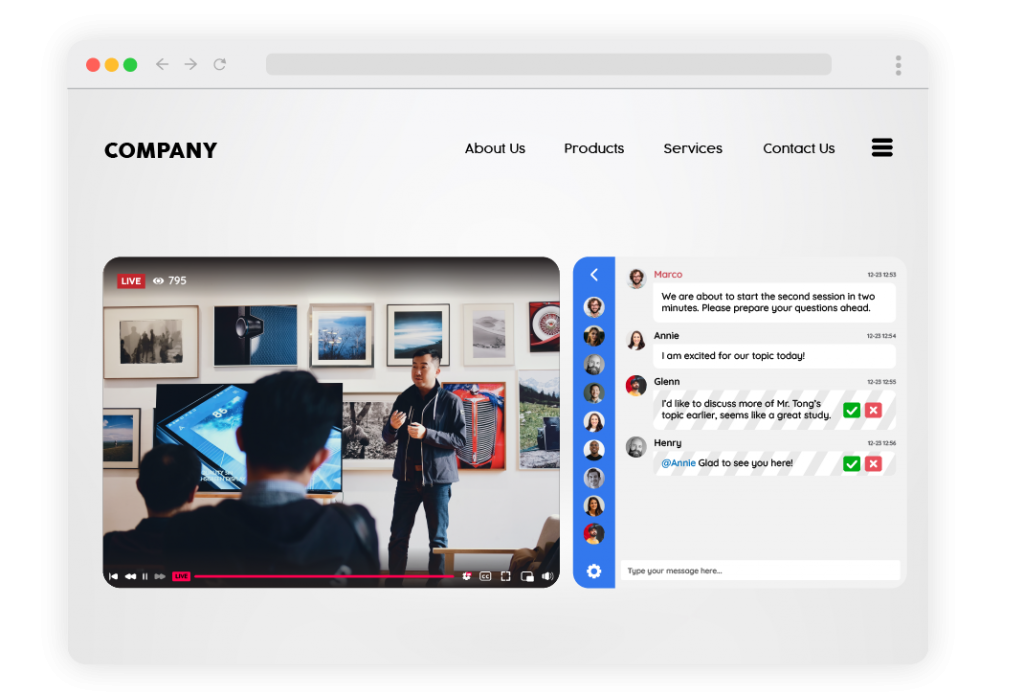
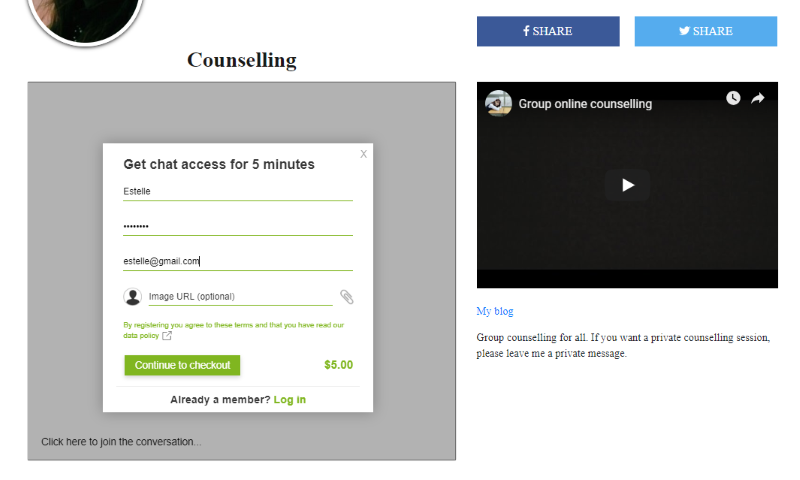
Chat room — RumbleTalk Pages’ competitive edge is its chat area. You get your own chat room on your minisite for free.
When you sign up for RumbleTalk, you are given access to a chat room. This is reflected on RumbleTalk Pages. As a result, if you want to change your chat settings, simply return to your admin panel.
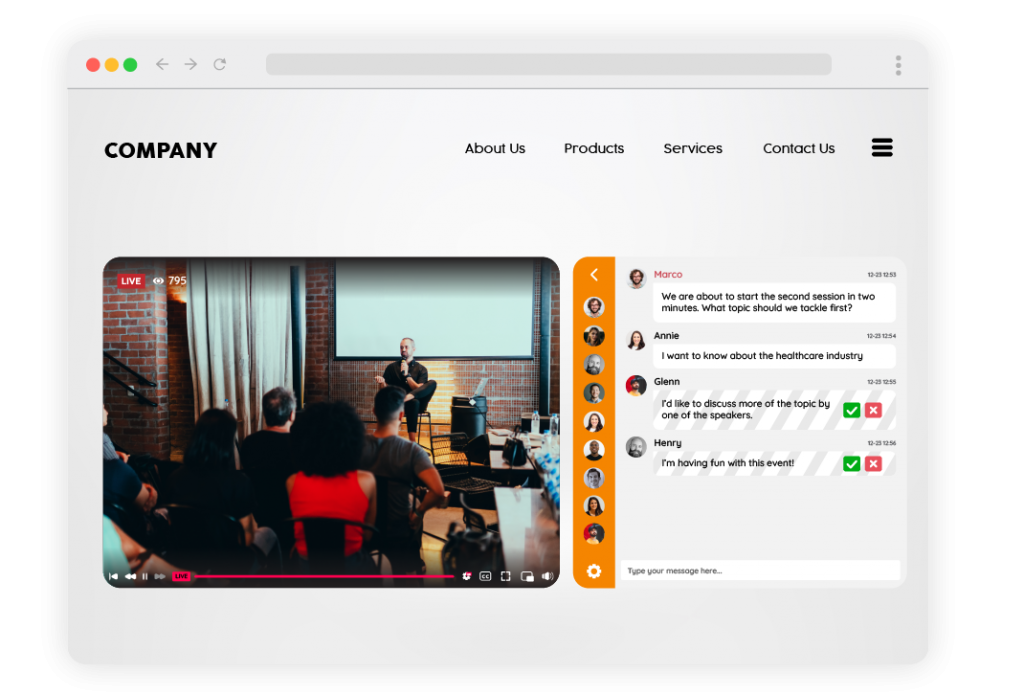
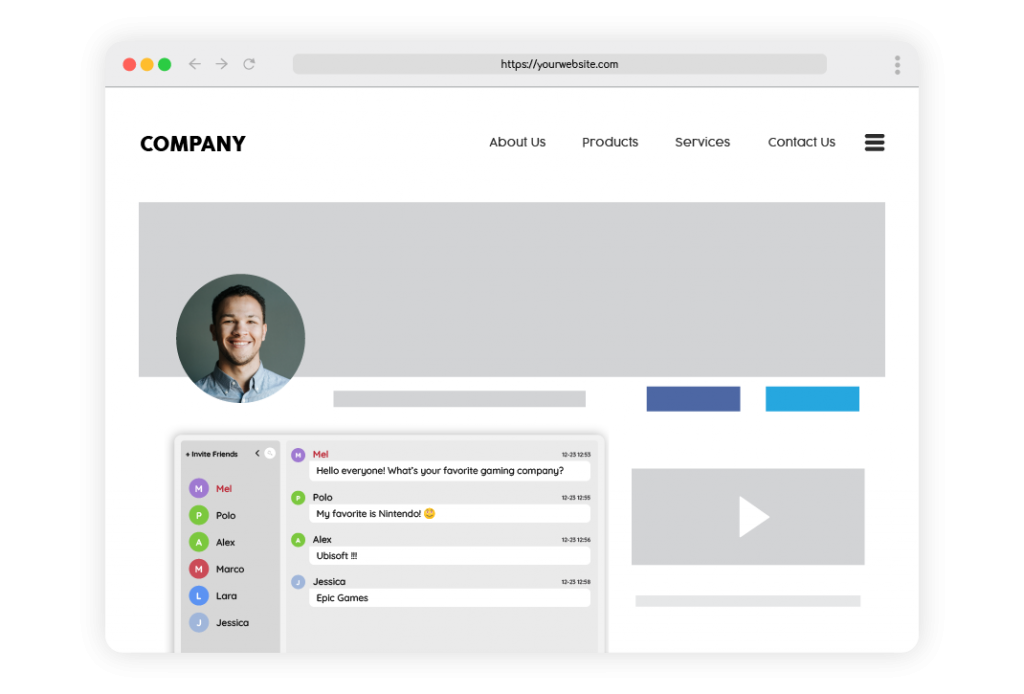
Here’s an example of how it appears.
It’s as simple as that. Ready to learn how to make your own?
Making an account on RumbleTalk
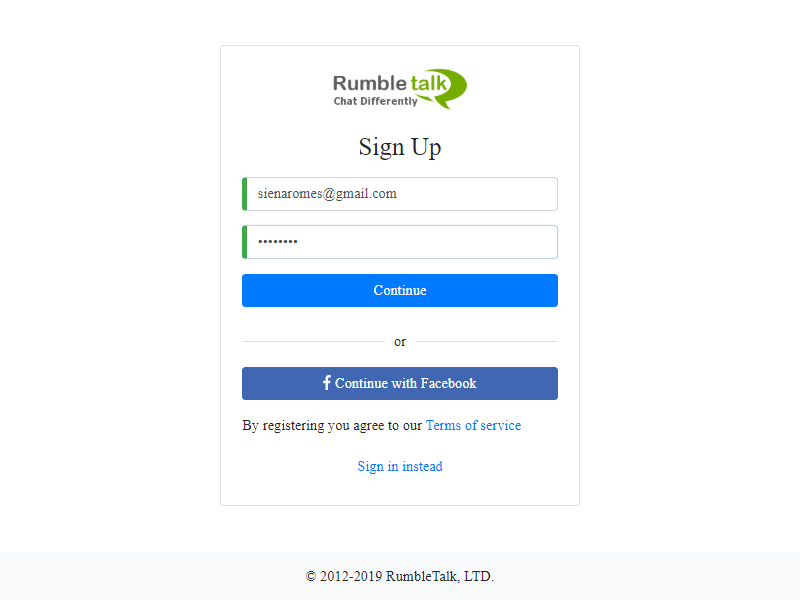
As previously stated, the feature is included in all RumbleTalk accounts. So, before you can start building your minisite, you must first create an account. Follow these simple steps to ensure a smooth registration:
- To begin, you must sign up for RumbleTalk. Simply visit our website and click Sign up.
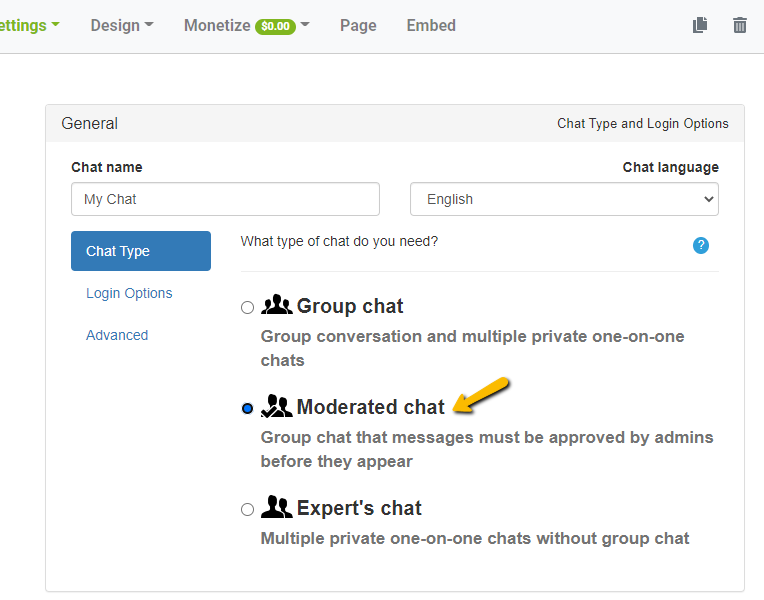
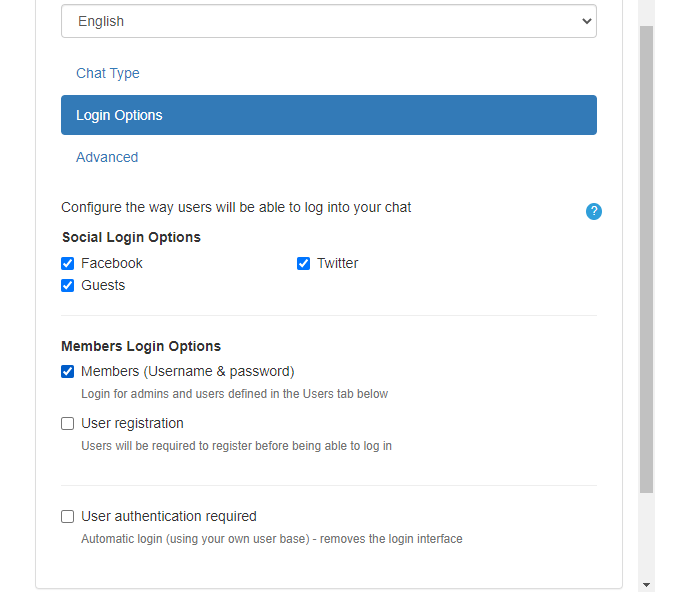
- Decide on the settings you want for your chat. Select a Group Chat, an Expert’s Chat, a Private Chat, or a Moderated Chat. It will then ask you if you want to enable monetization. Choose the best option for your product.
- Then, you’re now ready to begin editing your minisite. Simply navigate to Page in your admin panel and edit all of the aforementioned elements.
Making use of a mini website to market your product or service
Why use RumbleTalk Pages or RumbleTalk in general? Here are some of the reasons why.
To begin, you can incorporate YouTube Live into your website. This means you can interact with your visitors directly through your website. This is beneficial because it drives traffic to your website via RumbleTalk Pages.
Second, you can create your own minisite at no extra cost. If you require more rooms or seats, you can upgrade your account for a reasonable fee.
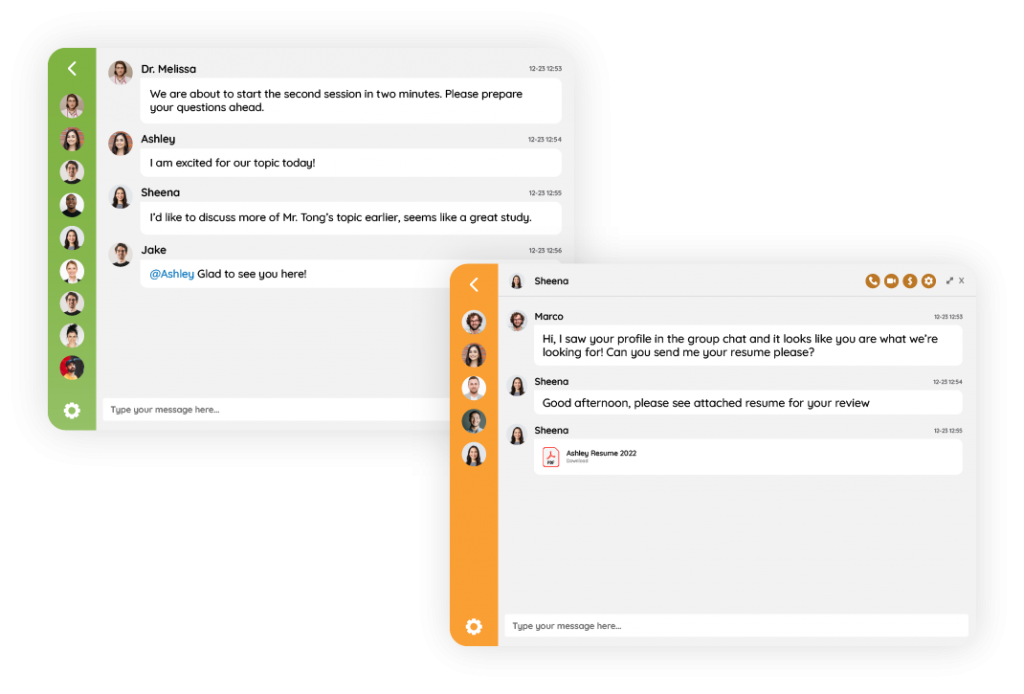
Finally, you can enable paid access to your chat. This effectively kills two birds with one stone. You get traffic and are compensated for your time and knowledge. Donations and private payment requests can also be enabled. Learn more about the paid access feature by visiting the knowledge base.
Check this blog to know how to set-up YouTube Live.
Increasing your digital presence
A minisite improves your digital footprint by adding links and driving traffic to your website. You create a brand by communicating with your target audience.
This, in turn, leads to advertising through word of mouth or social media sharing. It might not be the main attraction, but a mini website can be a powerful tool when used correctly.
Putting all these information in mind, you’re sure to expand your audience reach. Create an unforgettable live stream, chat with your audience, and design an incredible one-page mini website.
Do you want to learn more about chat features? Go to our website or schedule a demo via support@rumbletalk.com!
You can also stay up to date on the latest updates and features by following us on Facebook and Twitter.