
Members Chat and group chats are a great way to bring people together and make connections based on the things we have in common, from family groups to large communities of people who all share a common interest.
When deciding which type of chat to open for your group, you must consider the following factors:
Group chats are typically smaller and ideal for private connections. A group chat is perfect for chatting with up to 250 people, most of whom are family or close friends. Members are invited to join or can join directly through a link.
A community, or Members Chat, is a much larger, public-facing groups that are typically made up of strangers. A community can have an unlimited number of members and administrators.
The key word is inclusiveness
If someone joins a group chat in the middle of a conversation, they will miss out on everything that has gone before, and it may take some time to catch up. Not the best way to welcome a new member!
Everyone in a community has access to the entire chat history, regardless of when they joined. New members can browse previous messages or focus on the current chat and jump right in. They have that option.
You have the authority
Administrators can remove or add members to group chats.
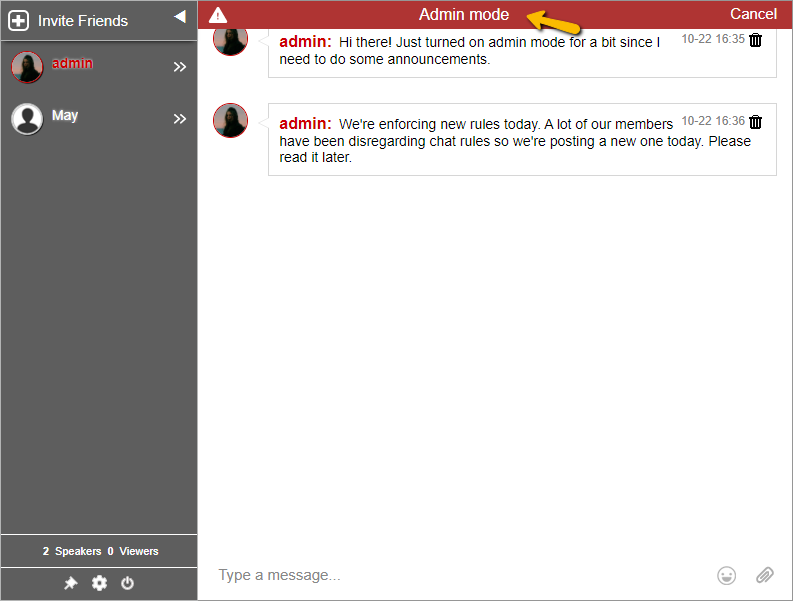
Administrators have special powers in communities to oversee the conversation. Admins can add and remove members, invite admins to write in the community chat, ban people from joining or rejoining the community, and appoint other admins to help manage the community.
Members Chat for active members
To allow your site members to view and communicate with one another, you must enable Members Chat.
To enable the chat type, follow these steps:
- Navigate to Settings on the admin panel.
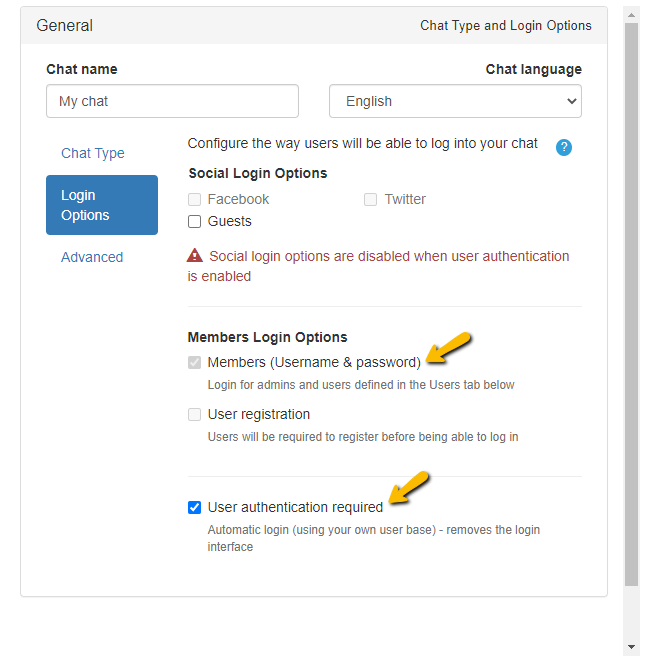
- Choose General & Logins > Members Login Options.
- Toggle the Members box.
- If you want to use your website’s membership, then toggle the User authentication required box.
- To add or remove members chat from your site, go to Users.
- Add or delete users that you want to add in your membership chat rooms. You can also change a user’s room access to enable or disable their access to a specific chat room (in this case, the members’ chat).
Managing members’ conversations
Members Chat is only available to members, so you can control who has access to it by adding or removing members from your site’s dashboard.
You may:
- Prevent a non-site member from accessing and participating in members chat rooms by not adding them to the user list.
- Approve a site member to allow them to use member areas and participate in a member’s chat room (this is applicable since RumbleTalk only allows manual approval and setup for site members).
Tip:
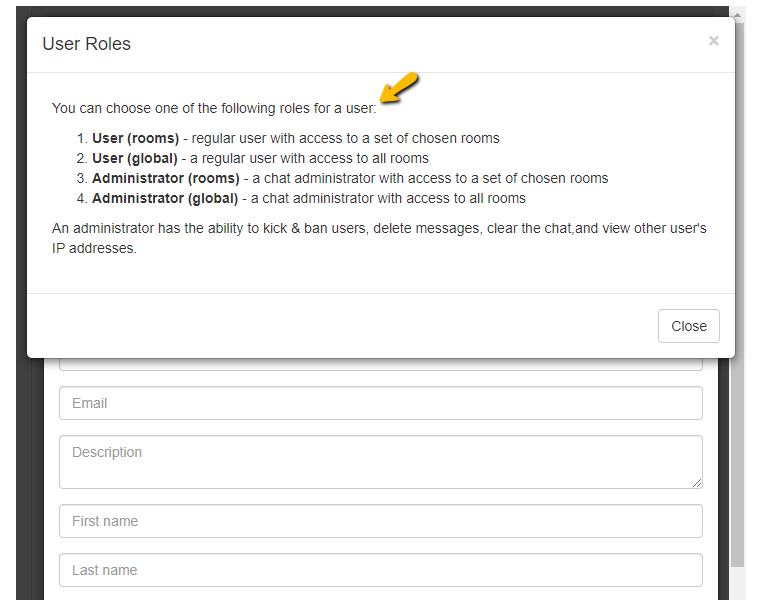
You can also assign different roles to members from this list to categorize them or make them an admin.
Chat creation and management
When you enable Members Chat, you can create additional group chat rooms. Multiple chat rooms are an excellent way to keep your members engaged and foster a sense of community around your website.
To create and manage a group chat, follow these steps:
- Log in to your RumbleTalk account.
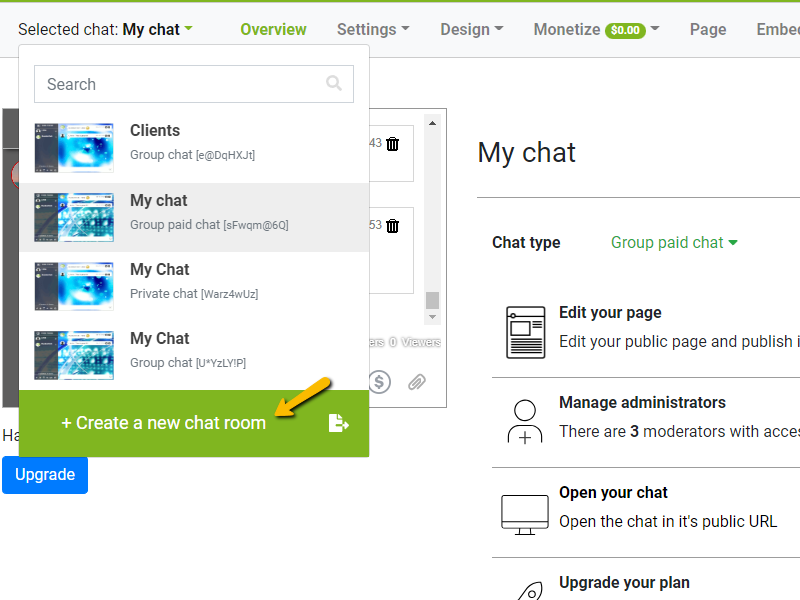
- Go to your admin panel and click Selected chat.
- In drop down box, click Create a new chat room.
- Enter the chat room name and click the Create button.
- Alternatively, you can also duplicate a chat room by clicking the duplicate chat option next to the trash icon on your admin panel.
When it comes to chatting with a large group of people, Members Chat helps to connect more people
Begin making those connections and building your community right away. Remember that your community can be based on anything, from customers to game-related topics.
If you want a free demo, send us a message at support@rumbletalk.com. Our support team would gladly arrange one for you.