What is membership chat? That’s what we’ll be tackling in this article.
But before that, welcome to our platform if you’re new here! We are a group chat for your website and we also have an expert chat for experts
Now, it’s easy to chat! and now it is easy to add a online group chat to engage your users!
Not only that, but we also have the option to add a chat paid access. “Hm, what is a chat with paid access?”
Well, to know more about this, why don’t we start?
Chat with paid access
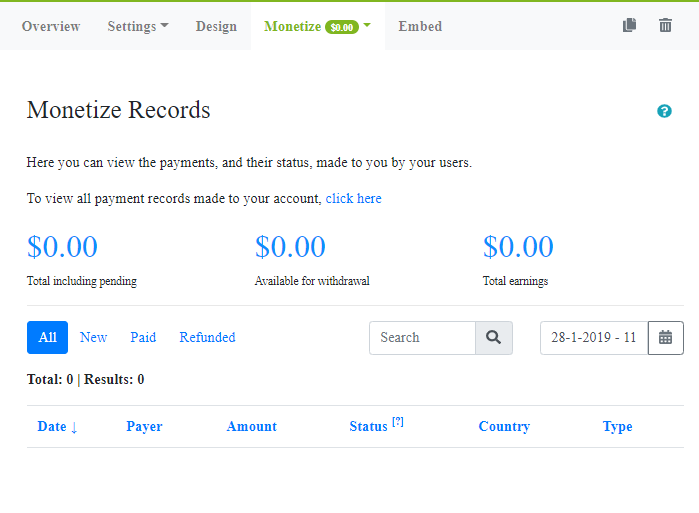
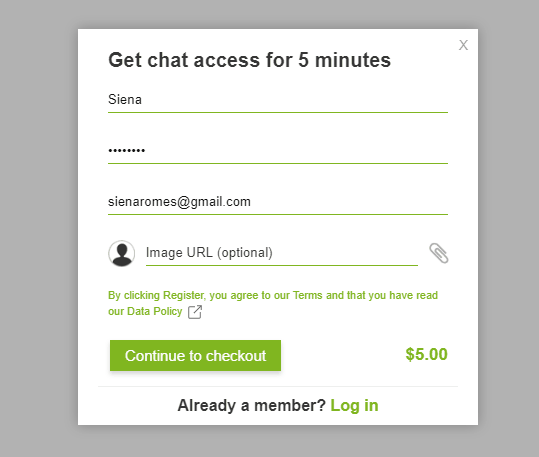
“What is paid access?” That’s probably what’s running on your mind now. Well, to put it simply, it’s a chat where you can add an entrance fee or subscription fee. This will help you monetize your social chat.
We offer two option for paid access. It’s either you put a time limit on your chat duration (a user can access for X minutes) or you may create a membership chat (paid monthly or yearly to gain access to your chat). The latest one is the one that we will be elaborating.
What is a membership chat?
According to a study in 2013 by Zhang et al, “the online group chat is a small-scale multiuser social networking platform, in which users participate in the discussions and send and receive information.”
Why don’t you use that to your advantage? Learning from the above study, a group chat is a must for any website.
Today, we’re tackling membership chat so let’s focus on that. You can do it in two ways:
- Monthly subscription
- Annually subscription – Set a discounted price for the annual membership. You can hook in a lot of customers with this tactic. Another plus is that you can have more members in no time.
This means you can charge your users for a recurring fee for a month or a yearly fee. Usually, you can persuade users on using a membership chat by lowering the fees for the annual membership. They will see this as a discount and a saving.
Still, you will be earning your share! If you want to know how to do it, I’ll show you in the next section.
How do you activate membership chat?
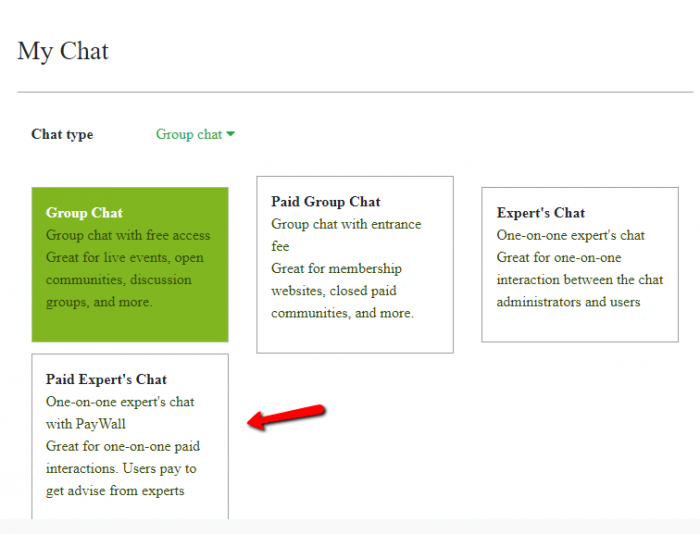
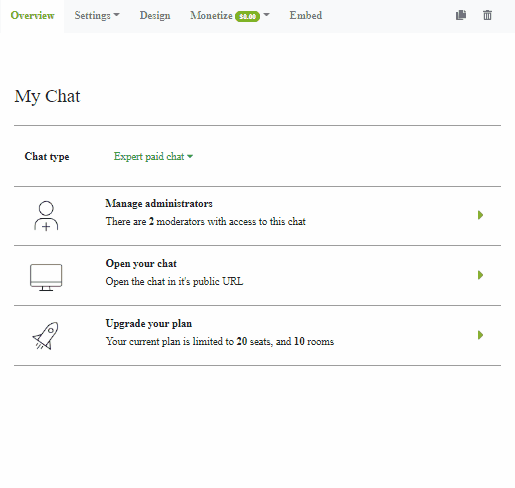
For starters, we have different types of chats. These are the following:
- Group chat – with free access and great for communities;
- Paid group chat – with an entrance fee, great for membership chat (which we are discussing);
- Expert’s chat – focused on professionals to have a platform to share their abilities;
- Paid expert’s chat – for one-on-one paid interactions.
The difference between group chat and expert’s chat is group chat is great for groups (of course), whereas expert’s chat is great for one-on-one interactions, just like private messaging.
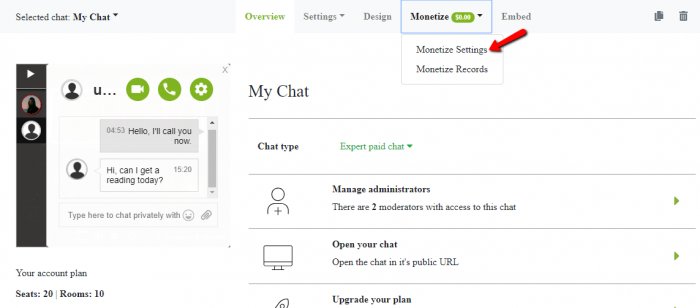
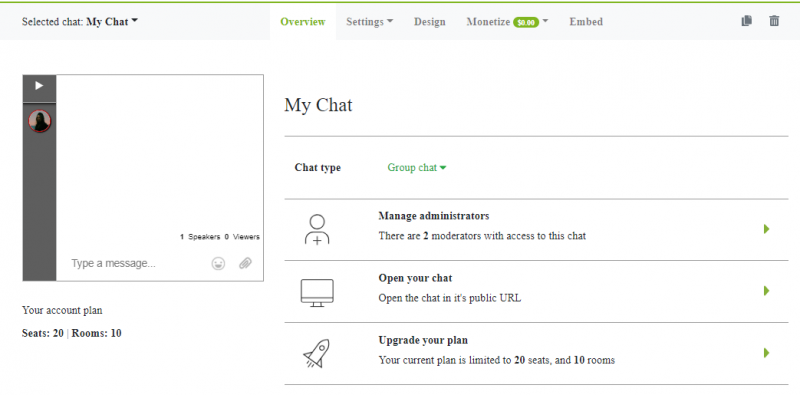
The ones with the “paid” ones are what we call membership chat. These are the ones with paid access. Let me show you.
- First, choose from paid group chat or paid expert’s chat.
- This activates the paywall option, which means your chat now has paid access.
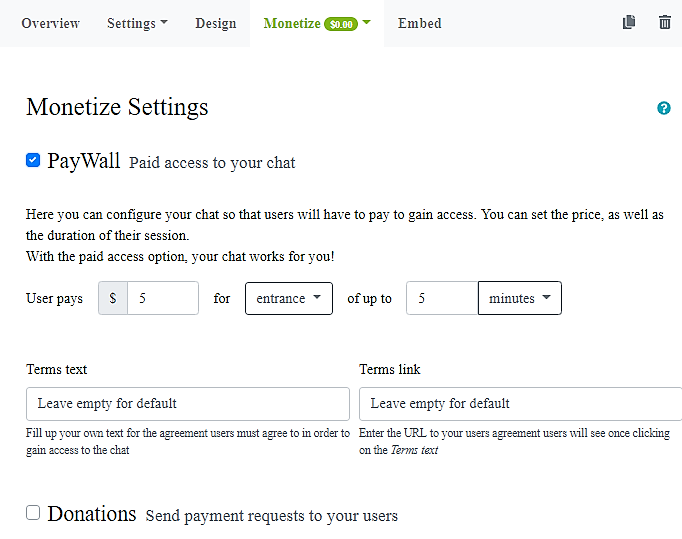
- For your chat to become a membership chat, decide on a fee for your chat. Then, choose whether users pay monthly or annually.
It’s as simple as that! No complicated steps or set-ups. We’ve made the interface like that to help our users navigate the admin panel with ease.
With membership chat, you can create a community and gain income. Who wouldn’t want that? Using your chat as an income stream can benefit both you and your website.