
If you run a membership website, you already know that keeping members engaged is just as important as getting them to sign up in the first place. People join communities because they want a connection, a place to interact, share experiences, or learn from others in real time. That’s where a WordPress community chat room changes everything.
In this guide, you’ll learn how to add a RumbleTalk chat room to your WordPress membership site without touching a single line of code. We’ll use only the RumbleTalk plugin and shortcodes, so setup takes just a few minutes.
You’ll also discover how to create different chat rooms for members and non-members, and how to choose between standard chats and pre-moderated (queued) chats.
Let’s dive in.
Why Add a Chat Room to Your Membership Website?
A chat room transforms your website from a static page into a living community.
Instead of reading and leaving, members stay, talk, and connect, which builds trust and loyalty.
Here are a few real-world examples:
- Course creators use members-only chat rooms for private discussions or live sessions.
- Nonprofits create public chat rooms for open Q&A events and private ones for staff or volunteers.
- Subscription communities offer exclusive chat access as part of their premium tier.
- Coaching sites run live office hours in pre-moderated chats where only approved questions appear.
The best part? You can set up all of this in WordPress using just one plugin.
Standard Chat vs. Pre-Moderated (Queued) Chat
Before jumping into setup, let’s talk about the two types of chat rooms you can create in RumbleTalk.
1. Standard Chat Room
This is the default type most communities use.
Messages appear instantly for everyone, and moderators can remove or ban users afterward if needed.
It’s ideal for:
- Casual member discussions
- Support or helpdesk chats
- Community hangouts
2. Pre-Moderated (Queued) Chat Room
In this mode, every message is first held in a queue.
Moderators can approve or reject each message before it’s visible to everyone.
It’s perfect for:
- Webinars and live Q&A sessions
- Investor updates or public briefings
- Events where you need full message control
You can switch between these two modes anytime in your RumbleTalk dashboard. The flexibility lets you run both open and moderated sessions from the same plugin.
Members-Only vs. Public Chat Rooms
One of the biggest advantages of using RumbleTalk is that you can easily create separate chat rooms for different audiences no coding, no extra plugins required.
- Members-Only Chat Room — Accessible only to logged-in users. Great for private community interactions, lessons, or support channels.
- Public Chat Room — Open to anyone visiting your site. Perfect for guest discussions, pre-sale events, or public announcements.
Each of these chats is a completely separate room with its own participants, design, and moderation settings.
For example:
- /members-chat/ — A private chat available only to subscribers.
- /public-chat/ — An open chat that anyone can see and join.
This setup gives you full flexibility to manage both public engagement and private member discussions side by side.
What You’ll Need Before You Start
Here’s everything you’ll need to follow along:
- A WordPress website with admin access
- A RumbleTalk account (free or paid, both work)
- The RumbleTalk Chat Plugin from the WordPress repository
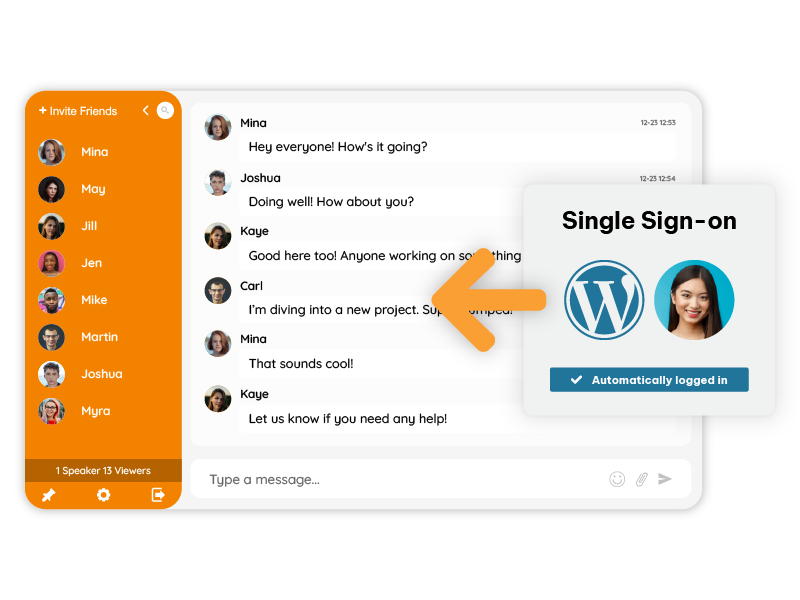
Optional but not required: If you’re already using a membership plugin like MemberPress, Restrict Content Pro, or Paid Memberships Pro, you can control chat access through those tools.
However, RumbleTalk also works perfectly with the built-in WordPress user system so even if you don’t use a membership plugin, logged-in users can still access private chats.
Step 1: Install and Activate the RumbleTalk Chat Plugin
- Log in to your WordPress admin dashboard.
- Go to Plugins → Add New.
- Search for “RumbleTalk Chat.”
- Click Install Now, then Activate.
After activation, you’ll see a new menu option called RumbleTalk Chat in your sidebar.
This is where you’ll manage all chat connections.
Step 2: Connect Your RumbleTalk Account
You can either:
- Log in with your existing RumbleTalk account, or
- Create a new one directly from the plugin panel.
Once logged in, your existing chat rooms will automatically sync.
If you’re new, the plugin will create a default chat room for you right away.
That’s it no need to embed code or copy JavaScript.
Everything works through a simple shortcode.
Step 3: Add Your Chat Room to a Page or Post Using Shortcodes
Each chat room in your account has its own shortcode. You can find it right inside the plugin settings.
Example:
[rumbletalk id="your_chat_id"]Copy that shortcode and paste it into:
- A WordPress page or post, or
- A Gutenberg HTML block, or
- A sidebar widget
Publish the page and your chat room is live instantly.
Visitors can now join and start chatting right inside your site.
Step 4: Create Separate Chat Rooms for Members and Non-Members
Now let’s create the two-room setup that makes membership sites shine.

- In your RumbleTalk dashboard, create two different chat rooms:
- One called “Members Chat”
- Another called “Public Chat”
- Copy the shortcode for each.
- Create two WordPress pages:
- /members-chat/ — paste the Members Chat shortcode
- /public-chat/ — paste the Public Chat shortcode
You now have two completely different chat environments:
- Members will see a private chat just for them.
- Visitors can join a separate public room without access to member discussions.
Controlling Access
If you use a membership plugin (like MemberPress or Paid Memberships Pro), you can restrict the members’ chat page to logged-in users.
If you don’t use any membership plugin, you can simply:
- Use WordPress’s built-in visibility settings (set the page to “Private” or “Password Protected”), or
- Add a simple login check shortcode around the RumbleTalk shortcode.
Either way, you’re in full control of who gets to chat where.
Step 5: Customize the Chat Room’s Design
RumbleTalk lets you completely match the chat look and feel to your website’s branding.
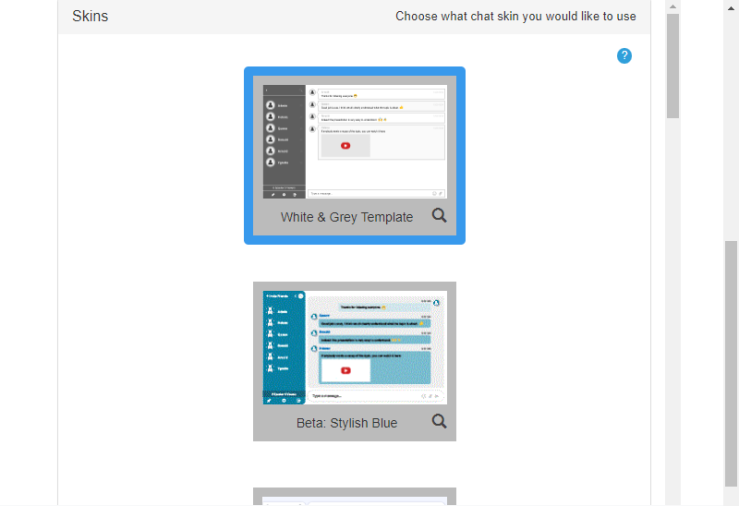
From your RumbleTalk dashboard, you can:
- Choose from multiple themes
- Change background colors, fonts, and button styles
- Upload a custom logo or background image
- Adjust chat size and positioning (fixed box, full-width, or floating window)
You can even give each chat room its own style:
- The members’ chat can have a dark, private look.
- The public chat can have bright, welcoming colors.
Everything updates instantly, no coding required.
Step 6: Moderate and Manage Your WordPress Community Chat
Whether you run a busy public room or a private community, moderation tools are key.
RumbleTalk gives you full control through a clean admin interface:
Moderator Roles
Assign moderators who can:
- Approve or delete messages
- Ban or mute users
- Manage message queues (for pre-moderated chats)
Queued Message Control
If you’re using pre-moderated chat, moderators see a queue of pending messages.
They can approve messages individually or clear them in bulk before they go live.
Private Messaging
Optionally enable one-to-one messages between members.
Perfect for networking or side discussions.
Polls and File Sharing
Enable polls for real-time feedback or allow file uploads for shared documents.
All moderation happens from the same RumbleTalk dashboard, easy to use, no switching windows.
Step 7: Test and Go Live
Before announcing your new chat, it’s smart to test everything.
Test Access Levels
- Log in as a member and confirm you can access the members’ chat.
- Log out and confirm you can still see the public chat but not the members’ one.
Test Responsiveness
Open the chat on desktop, tablet, and mobile.
The RumbleTalk chat automatically adjusts its layout to fit any screen size.
Test Moderation
If you’re using queued chat, send a few test messages to confirm they appear in the moderator queue.
Try approving and rejecting them to see the flow.
Once you’re happy, publish both chat pages, your WordPress community chat is live.
Bonus: Tips for Building an Active WordPress Community Chat
A WordPress community chat room is only as good as the activity inside it. Here are a few ideas to keep your members engaged:
- Host weekly discussions, set a topic and invite members to share ideas.
- Run live Q&A sessions using the queued chat type.
- Use polls to gather instant feedback.
- Announce updates and tag key members during live sessions.
- Recognize active members, simple shoutouts go a long way.
The goal is to make your chat room feel like a community, not just a feature.
When members know their input matters, they’ll keep coming back.
Why RumbleTalk Works So Well for WordPress Membership Sites
RumbleTalk’s advantage lies in simplicity + flexibility.
- Installable directly from WordPress
- No code embedding, shortcodes only
- Works with or without membership plugins
- Supports multiple rooms for members, guests, or events
- Offers both real-time and queued moderation modes
- Fully customizable themes and moderation controls
That means you can build a private members’ lounge, a public Q&A room, or even both in one setup.
It’s a lightweight solution that integrates seamlessly into any WordPress environment, from simple blogs to full-scale online communities.
Final Thoughts
Building a community takes effort, but giving your members a place to talk shouldn’t.
With the RumbleTalk WordPress plugin, you can add a beautiful, functional, and secure chat room in just a few minutes.
You decide:
- Who can join
- How messages are moderated
- How each chat looks and behaves
Whether you want a quiet members-only discussion or a busy public event chat, it’s all possible, directly from your WordPress dashboard.
So, go ahead. Install the plugin, paste your shortcode, and watch your website turn into a living community.