Here at RumbleTalk, we’ve been busy working behind the scenes to bring you something really special—an overview of the admin panel!
While we regularly release new front-end features such as moving and resizing the private chat window or even deleting messages in a private chat, today, we would like to look back at our admin panel. You’ve guessed it right—we’re here to give you a quick tour!
The admin panel has a variety of new settings including options, features, advanced settings, and more. Read on to see what’s included and if what you’re looking for is present.
Quick overview of the admin panel
1) Clean and Sleek Look
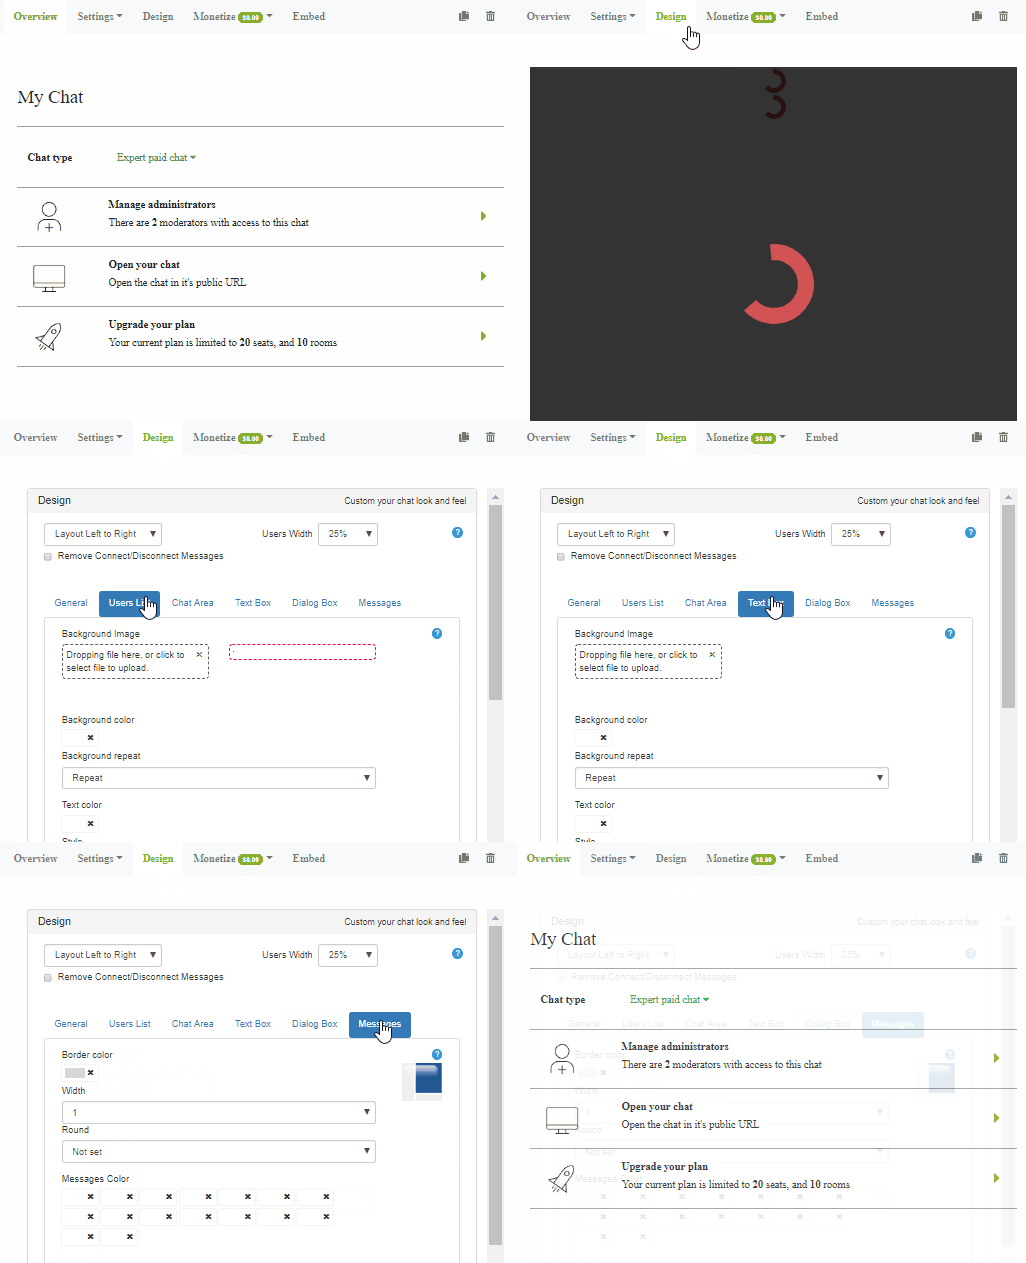
First things first, when it comes to back-end settings, we think it’s important not only to be functional but also to look great! The updated design is an all-in-one admin panel. It packs everything into one easy-to-use screen. Unlike the previous one that looked boxy and a bit cluttered, now it looks sleek and clean. With the new white and green colors, it represents RumbleTalk as a user-friendly interface.
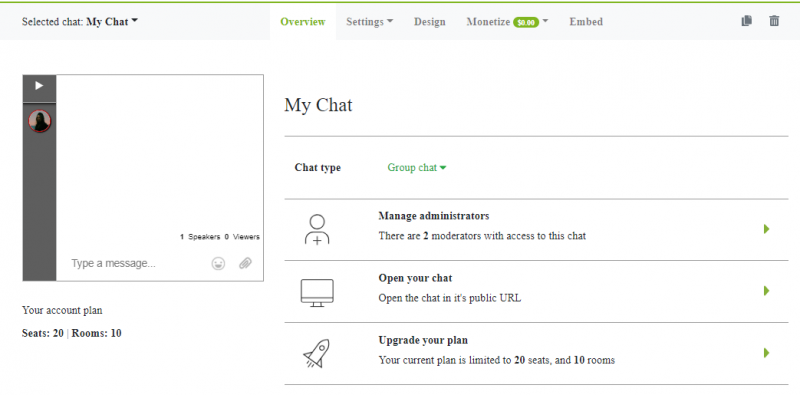
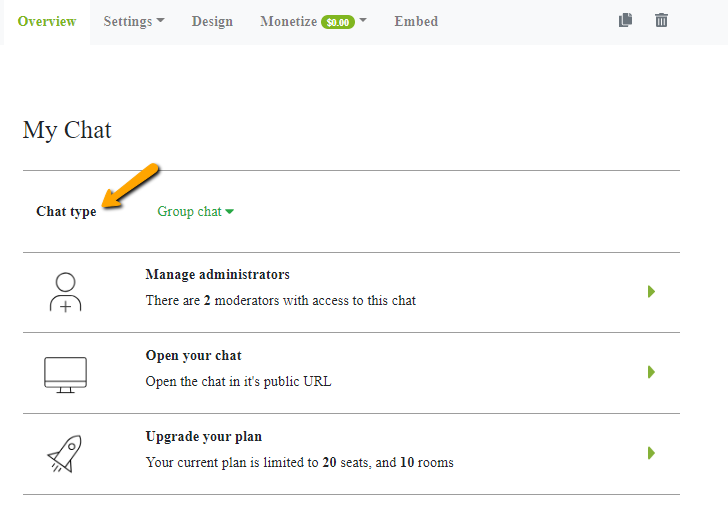
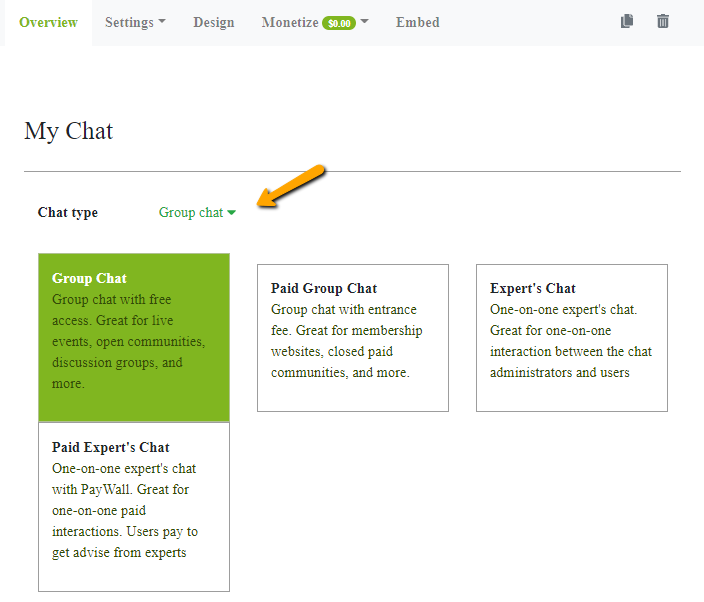
In the updated design, you can just click on any of the individual settings and you’ll be redirected. For example, see “Chat type” right there? If you click it, the other chat types will pop-up and you can immediately change it.
2) The Admin Panel Has Super Fast Load Times
In our previous admin panel, we can see that the interface was less responsive. Therefore, we’ve upgraded and loading time is quick as it can get. Now, the biggest benefit provided by the admin panel is its fast response. In just a click, you’ll be almost immediately redirected to the settings page. Finally, you don’t have to wait that much longer!
In addition, once you’re in the admin panel, you’ll see every setting on one page. So, if you decide to change one, the loading time it will take is not slow. This gives you a fast and easy-to-use admin panel.
3) You Can Export Your Users into a CSV File
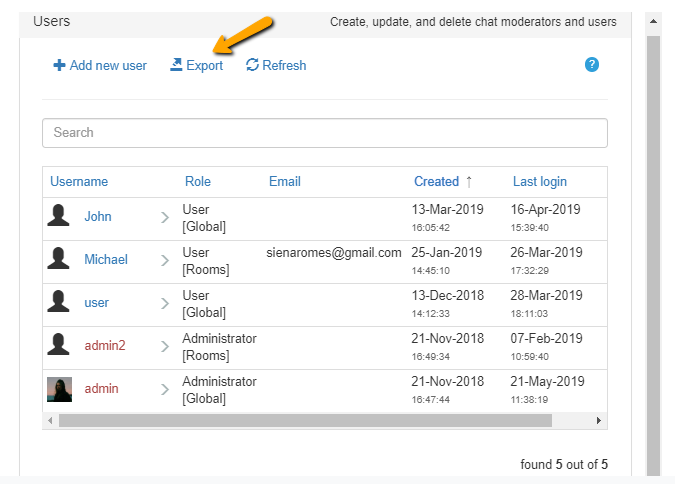
If you want to export your users, it’s now possible with the admin panel. This option exports your users in a spreadsheet and is particularly handy if you want to take note of attendees. For those who use more advanced CRM programs, by exporting users in a CSV file, you can then upload and integrate the chat users with your other systems. This is the simplest way to do that.
4) New Search Option to Look for Users in the Users Tab
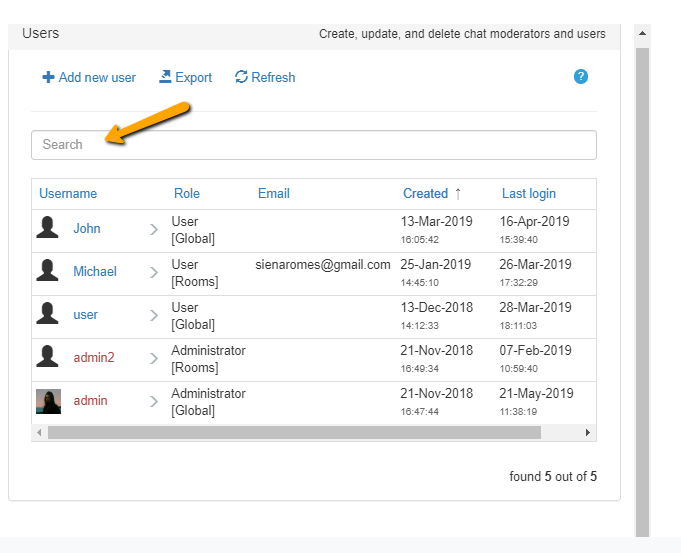
Are you having trouble looking for a specific user in your users list? Well, now you can search for that user using the search option. This is great for chat owners who just have too many users in one chat. By taking advantage of this option, you don’t have to scroll through a long list just to find an individual chatter. Just search his/her name and let the admin panel do all the work for you. The search option is simultaneous, meaning it searches while you type.
To do a quick search through your database of users, first, click on the “Users” tab. Then, simply type a name into the “Search” box. As a result, the user you’re looking for will pop right up.
Here’s an example of searching for a user. In here, we searched for “admin.”
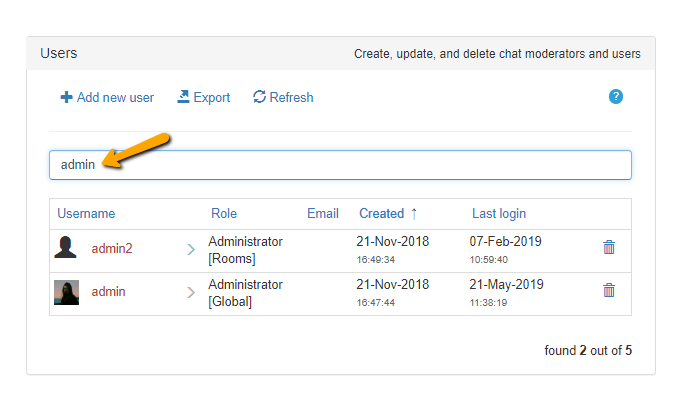
That’s how the search option works! If you have too many users in one place, then you can just search and arrange them. You can change their names or even delete them.
5) New Archive Settings and Icons Added
Lastly, we’ve added an option to enable or disable the archive settings. What does this mean? This means that you can turn on or off the chat history. It can be seen by everyone or only the admin. Also, there’s an added option where you can export the transcripts of a chat.
To do this, you need to go to “History” in the admin panel. You will see the aforementioned features.
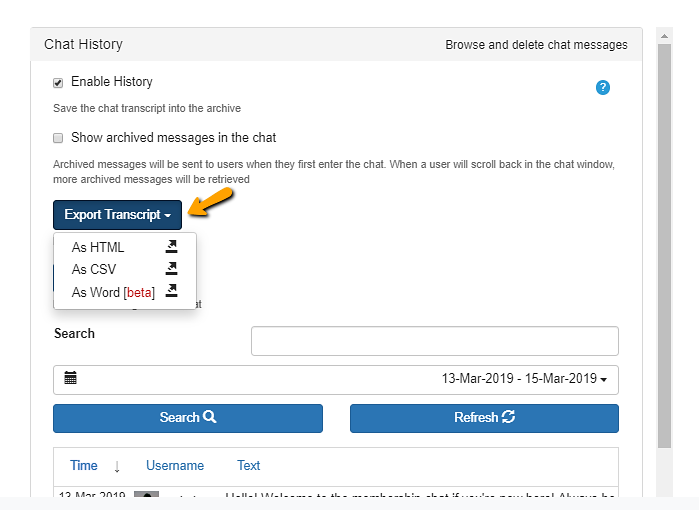
In the previous example, you can export transcripts through the following:
- as HTML,
- as CSV,
- and as Word (although this is still in beta mode).
Choose what works best for you.
6) An Admin Panel for Every Chat Room
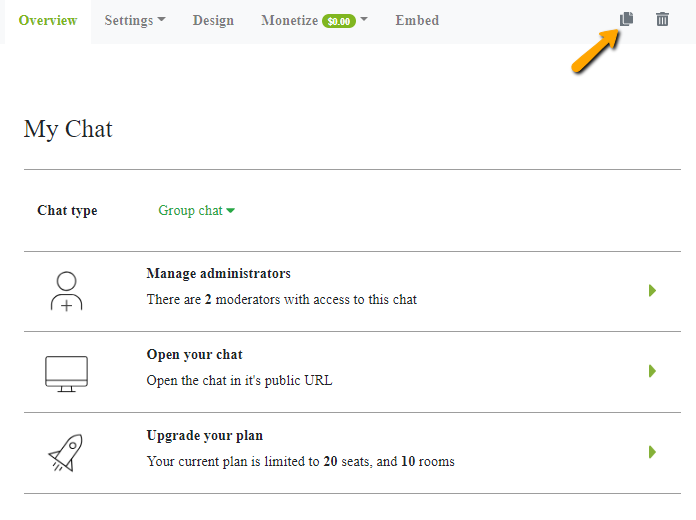
Previously, all the chat rooms were displayed on one page. Now, for a cleaner look, each chat room has its own admin panel. For example, if you have multiple rooms, you can customize the settings of each one. In addition, we even added the option of duplicating chat rooms.
To do this, you can click the “Duplicate chat” button on the top right corner. You can select what you want to duplicate, from settings to the actual design. You will now see the duplicated chat on the list of your chat rooms. Beside it is the option to delete your chat, which is also a feature that wasn’t available in the old admin panel.
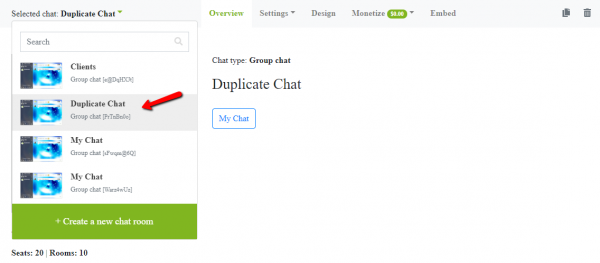
As a customizable chat room, you can also try out different themes for every chat room. Every chat room has a purpose. For each one, you can find what theme and background suits it best. You no longer have to stick with only one when you can have different designs.
Want to know more about us?
For those who are already used to the previous settings, the updated admin panel already incorporated everything in the old one. Users don’t have to worry about not understanding the admin panel. You can always check out the knowledge base if you’re having a hard time looking for something.
On our end, we are very excited to bring these developments and look forward to hearing your feedback. To contact us about the admin panel, you can also do so by clicking on your profile. Choose “Support” and a page will pop-up. We’d love to know how we can help and how we can improve our platform. If you’re not yet a user but you want to know more about our platform, contact us on Facebook or Twitter. We’ll do our best to accommodate your concerns and questions about us.
