RumbleTalk rolled out three new updates for our beta users over the weekend that touch on different aspects of the group chat experience.
- Better Communication: Chat administrators can privately contact users even when private messages are disabled.
- Better Profiles: User profiles can now include a description.
- Better Design: The profile and private communication menu design has been improved.
If you’d like to be one of our beta users, just let us know!
More details below:
Better Communication
Previously, private communication could be entirely enabled or disabled but there were no exceptions. Either way, the setting applied to everyone in the group chat room.
Our customers asked for the ability to disable private communications among all users and still allow chat administrators to have the ability to initiate a private conversation with a user.
Now this is possible!
From the chat setting menu, under general, select BOTH private chat and administrator only. With this configuration, chat administrators can click on the user they want to speak privately to and send a message or make an audio or video call, but users will not.
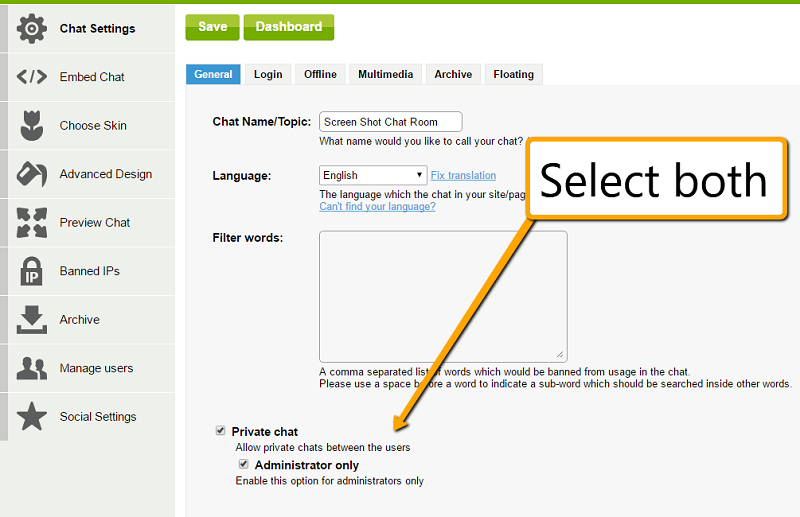
We’ll have a support page to explain this in detail soon.
Better Profiles
We’ve always had the ability to write a notes or a description of a user in the Managed Users tab of the settings panel.
With our latest update, these descriptions will appear for everyone to see within the group chat room.
To see a user’s description from within the group chat, click on the user profile and then the settings icon.
Better Design
While we were working on the previous two updates, we also improved certain aspects of the user profile and private communication dialog box.
Take a look!

We prioritize our features based on customer feedback. Let us know what you want to see next!

 Selecting both options will allow the group chat owner and users to see and export the full chat transcript.

