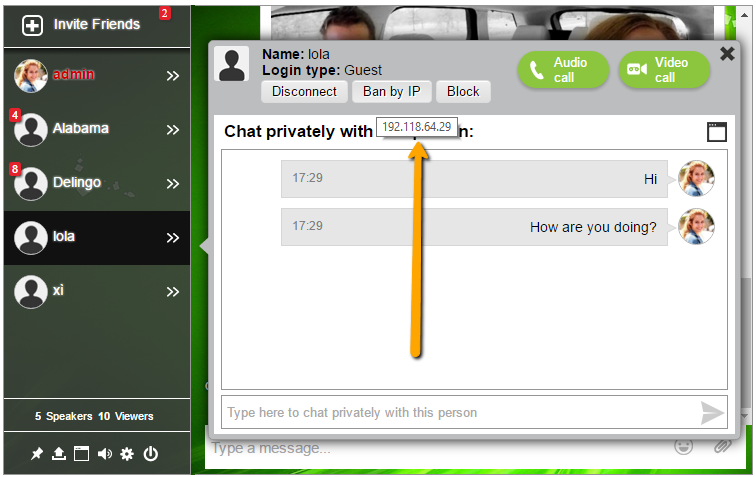
In the never ending effort to find new and creative ways to engage your online community (or perhaps to engage your community online) RumbleTalk group chat just might have the answer for you: online panel discussions.
With RumbleTalk, you’ll be able to gather experts from all corners of the world in one dialog box for a discussion that can be watched by an international audience.
There are many advantages for your organization to benefit from hosting an online panel discussion. This post will go over these advantages and show you how to set up as well.
If you’ve already decided to host a RumbleTalk panel discussion, click here to skip directly to the ‘How to’ section.
First, what is an online panel discussion?
Picture this: within your website, a RumbleTalk group chat designed to match your theme, is embedded where you choose. In the left most column of the group chat, a users-panel contains a short list of the participating experts.
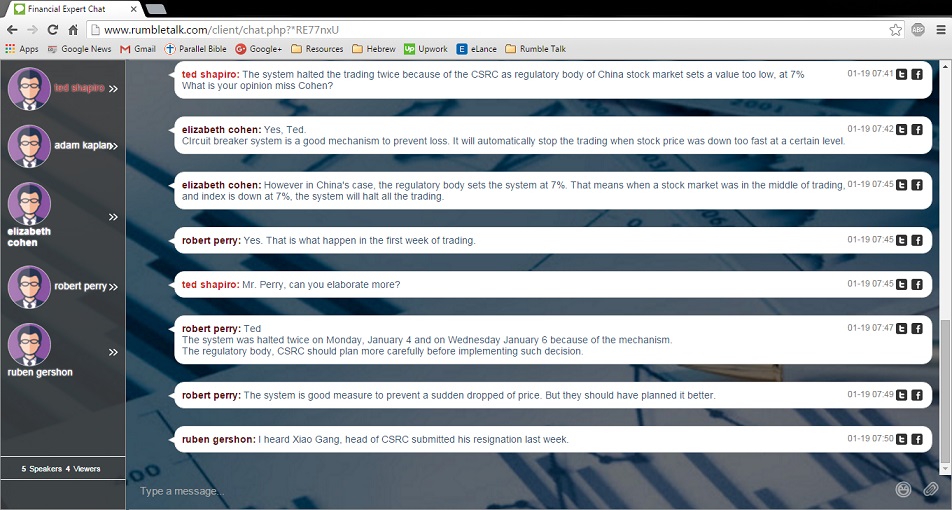
The moderator types out questions, posts videos, or shares documents for the experts to see and interact with. Once the information is dispensed, the experts type out their answers or share media in response.
While the discussion is unfolding, anyone visiting the site is able to watch, but not disrupt, the conversation. Viewers can access the shared documents, links, and embedded videos to get a full understanding of the discourse context.
After the online panel discussion has concluded, the group chat owner will have the opportunity to save the chat and export it as an HTML file.
Immediate advantages of hosting an online panel discussion
A typical panel discussion has a lot of overhead expenses and physical limitations.
- A venue must be booked that will be convenient for the audience and panelists in both location and time.
- Panelists must be either all local or be afforded a travel/speaking stipend.
- The audience can only be as large as the venue permits.
- Special A/V equipment is needed to share videos or other contextual media.
- Distractions cause missed moments and ideas.
- Recording and distributing the event is yet another expense.
And that’s just to name the most obvious!
Rather than getting hung up on these barriers, organizations can turn to the alternative online panel discussion that leaps over these hurdles with ease.
- A RumbleTalk online panel discussion can convene on your website or as an independent URL distributed to your audience.
- Panelists and viewers can participate in the conversation wherever they find an internet connection using a PC, tablet or smart phone.
- Audiences can be as big as your chosen plan allows.
- Sharing media is easy with built in RumbleTalk tools.
- The conversation is written so viewers can reread statements to better understand the discussed concepts.
- The discussion can be preserved automatically and distributed easily.
And after the panel discussion?
After the panel discussion, the group chat owner will have a choice to make: let the conversation rest at conclusion, or use the transcript to further the mission.
RumbleTalk group chat transcripts can be exported as a HTML file and then published online.
You can read the full explanation of this feature here. But for now, I’ll drive home two key points.
- When you publish your online panel discussion transcript, you’ll widen your audience to those who weren’t able to watch in the first place.
- By publishing as an HTML file, search engines will be able to pick up on the key words used within the chat, driving more traffic to your cause.
How to set up your online panel discussion
We’ve made it easy, just follow these steps and if you get hung up on anything, contact support@rumbletalk.com for help.
- Create a RumbleTalk account
- Adjust the settings for an online panel discussion
- Embed and invite participants
Step One: Creating a RumbleTalk account
Starting at the RumbleTalk homepage, either log in to your existing account or if needed, sign up for a new account.
Once you are logged in you’ll need to select a plan that will accommodate the number of panelists and viewers you expect to attend.
It’s important to note here that each plan allows the same number of users as it does viewers. If you select a plan for 250 chatters, you’ll be able to have 250 viewers.
If you don’t see a plan large enough for your audience (good for you!) contact us at support@rumbletalk.com for more options.
Step Two: Adjust the settings for an online panel discussion
From the admin panel, you’ll be able to customize the look of the group chat to fit your organization. You can include your logo or color scheme to blend into your site.
By default, RumbleTalk group chats are configured to work as an open and public chat room. You’ll need to change this to limit the number of chatters and ensure viewers are allowed.
Under the Login tab of the admin panel leave all options unchecked EXCEPT:
- Allow viewers (listeners)
- Allow RumbleTalk login
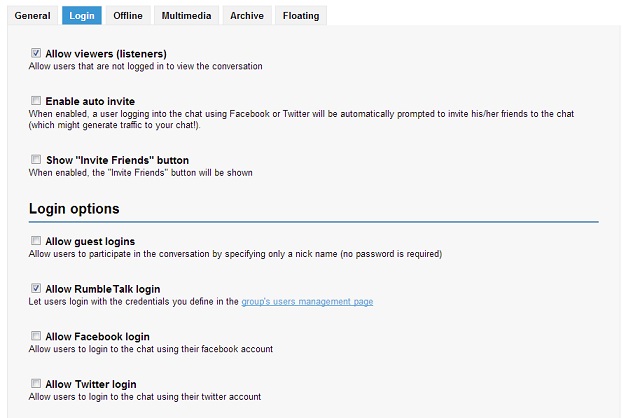
You can also check ‘Enable auto invite’ and ‘Show “Invite Friends” button’ for panelists and viewers to share the group chat on social media, however, these are not necessary.
The next essential setting to is set up your panelists.
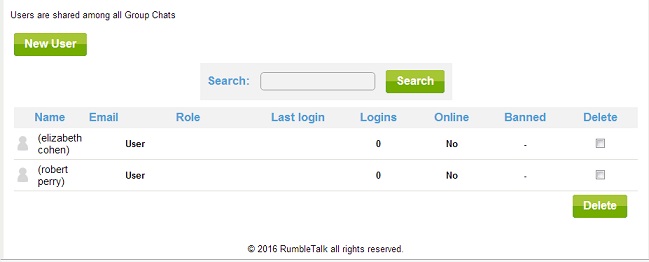
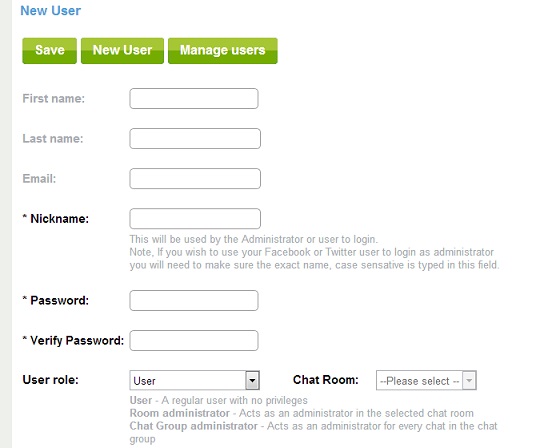
Click on the link that says ‘group’s users management page’ and then click the button to add a new user. Give each user a nickname (or just use their real name) and a password. You can also assign an avatar or profile picture to each user. Send this information to your panelists privately.
Step Three: Embed and invite participants
The final step is to embed your chat in your website.
From your admin panel, you’ll be given a single line of code to be placed within your site. The chat itself is responsive and will fit itself in whatever space you give it.
If you don’t have a website, there are still options to host your group chat. You can connect your RumbleTalk account to your Facebook page or share your chat URL with your desired audience.
The RumbleTalk platform is versatile. If you want to use all three options, go ahead! If you want to embed the chat on each of your panelists sites, no problem!
The group chat you purchase from RumbleTalk can be placed in as many places around the web as you wish.
Then all you have to do is invite guests.
If you have any questions along the way, feel free to contact us at support@rumbletalk.com. We’re happy to help you host an innovative online panel discussion.

